Article Summary
Recording a podcast means completing each technical step—mic setup, software config, acoustic prep, and clean capture—before a single word goes live. This article covers equipment choices, free DAWs like Audacity and GarageBand, recording techniques, editing, and publishing. You'll gain a clear, actionable path to record a podcast that sounds professional from day one.
You’ve done the hard work of brainstorming topics, defining your audience, and outlining your first few episodes. You know exactly what you want to say, and you have a unique voice the world needs to hear.
But now comes the moment of truth: moving from the planning phase to the production studio. If you’re an aspiring podcaster, a content creator expanding your reach, or a small business owner ready to leverage audio marketing, you might be asking: How to record a podcast professionally?
In this guide we will walk you through every technical step necessary—from choosing the right microphone to getting familiar with free podcast recording software—so you can confidently hit record and produce your first high-quality episode.
Ready to transform your ideas into a podcast? Let’s dive into building your digital studio.
Essential Equipment: Microphones, Recording Software, and More
The single most crucial factor in podcast success is the quality of your audio. Listeners will forgive occasional mistakes in editing, but they will quickly tune out poor sound quality. Therefore, your first investment should be in a good podcast microphone.
Pro Tip: Avoid using your computer’s built-in mic; it simply cannot match the quality provided by dedicated recording gear.
Choosing the Right Microphone for Your Podcast
Microphones generally fall into two categories based on how they connect to your computer: USB and XLR.
| Connectivity Type | Description | Best For |
| USB Microphones | Offer plug-and-play simplicity. They connect directly to your PC or Mac. | Beginners and solo podcasters. |
| XLR Microphones | Typically offer higher audio quality and versatility but require an audio interface or preamplifier to connect to your computer. | Intermediate and professional setups, especially those involving mixers or multiple guests. |
For those just starting out, a quality USB mic is often the perfect choice.
Top Microphone Recommendations
When choosing a podcast microphone, focus on dynamic microphones, especially if you are recording in a less-than-perfect acoustic environment, as they tend to pick up less ambient room noise compared to condenser mics.
- Samson Q2U: This dynamic microphone is highly recommended for beginners. It features both USB and XLR outputs, making it flexible for future upgrades.
- Audio-Technica ATR2100x-USB: Another excellent option, this mic is popular worldwide due to its fantastic quality and reasonable price. It also features both USB and XLR inputs.
- Blue Yeti: This is a popular USB option, known for its multiple recording patterns. However, the Blue Yeti is a condenser microphone, meaning it performs best in rooms with good acoustics, as it picks up more background noise and table bumps.
Don’t Forget the Accessories:
To ensure crystal-clear audio, you need a few essential accessories:
- Pop Filter: This is fundamental. It sits between you and the mic and reduces harsh plosive sounds (like “P”s and “B”s), making your audio cleaner and more professional.
- Boom Arm or Mic Stand: These keep your mic stable and positioned correctly without needing to hold it. A boom arm is useful if you want a professional setup that saves desktop space.
- Closed-Back Headphones: You need to monitor your sound in real-time while recording. Wearing headphones helps you hear exactly what the mic is capturing, allowing you to catch background noise or setup errors instantly.
If you choose an XLR microphone, you will also need an audio interface (like the Focusrite Scarlett 2i2 or BEHRINGER UMC202HD) to connect the mic to your computer.
Podcast Recording Software: Your Digital Studio
Once your microphone is set up, you need a Digital Audio Workstation (DAW) or podcast recording software to capture and edit your audio.
The good news is that you don’t need expensive tools to sound great. The principle remains: it’s not what you have, it’s how you use it.
Free Options That Deliver Professional Results
Many podcasters, both beginners and experienced, rely on powerful free tools.
Audacity for Podcast Recording
Audacity is perhaps the most popular program worldwide for audio recording.
Why Choose Audacity? It is free and open-source. It works seamlessly across all major operating systems: Windows, Mac, and Linux. It’s suitable for both beginners and experienced users.
Quick Audacity Setup Guide:
- Select Your Microphone: In the main interface, choose your external microphone as the input device.
- Choose Recording Channel: Select mono for voice recording, as it works perfectly for spoken podcasts and is a very common setup.
- Enable Monitoring: If your microphone doesn’t offer direct headphone return, ensure your system is set up to let you hear your voice through your headphones (return/monitor). This allows you to monitor your sound quality in real time.
- Test Your Levels: Before you record the whole episode, always perform a test recording (30 seconds to a minute) to ensure the audio is capturing correctly and the quality is good.
If you want to delve deeper into using Audacity, there are countless tutorials available online that can help you specialize further in audio editing. These Udemy courses will help you edit your audio with confidence:
- The Beginner’s Audacity Bootcamp: Learn Audio Editing Fast
- Audacity: Audio Editing with Powerful Free Audacity Software
GarageBand: The Option for the Apple Users
If you are a Mac user, learning how to record a podcast on GarageBand is an easy and highly effective route. GarageBand is a free application that usually comes standard on Apple computers.
GarageBand Setup Steps:
- Create a Project: Open GarageBand and select a new “Voice” project or a clean project.
- Choose Audio Input: Select your microphone as the audio input. This input selection is critical for capturing your voice.
- Clean the Interface: Adjust the interface to streamline your workflow: disable the metronome and hide the library to focus only on the timeline.
- Recording Interviews: If you are recording with multiple microphones for an interview, add a “New Audio Track” for each guest and ensure each track is linked to the correct input device (Input 1, Input 2, etc.).
- Editing Tip: Use Command + T to split audio regions during editing. This is a handy shortcut for making precise cuts. You can also use the ‘Delete and Move’ function to automatically close the gap created by a deletion, keeping the audio flow smooth.
Want to really learn how to use Garageband? Check this out: Vocal Recording for Beginners: GarageBand Tutorial
Other Digital Audio Workstations (DAWs)
While Audacity and GarageBand are excellent starting points, other powerful software options are available:
- Adobe Audition: A professional, paid platform offering advanced editing, restoration, and masterization tools. Learn more with this course: Adobe Audition CC: The Beginner’s Guide to Adobe Audition.
- Descript: A unique tool that automatically transcribes spoken words, allowing you to edit the audio simply by editing the text transcript. If you’re serious about podcasting, this will be helpful: Interview Podcast Editing with Descript Underlord (A to Z).
- Logic Pro: A paid application for Mac users, often used for more complex audio production.
Setting Up Your Recording Space and Technique
Did you know that great acoustics are often more important than expensive equipment?
Creating Professional Audio at Home
1. Choose the Right Room: Select the quietest space available in your home. Rooms with soft furnishings (carpets, curtains, bookshelves, or heavy clothing) will help absorb sound and prevent echo or reverb.
2. Test the Acoustics: A simple test is to clap your hands. If the sound bounces back (reverb), you need more sound absorption. You can temporarily add blankets or cushions to the area behind your microphone to reduce bounce.
3. Mic Placement: Maintain consistent microphone distance. Position your podcast microphone 6–8 inches from your mouth. This distance is crucial for capturing rich sound while minimizing harsh breaths and mouth noises.
Recording Your Podcast: Step-by-Step
Pre-Recording Checklist
Always run through these steps before starting the actual episode:
- Sound Level Test: Record 30 seconds of speech to verify your microphone is capturing audio.
- Target Levels: Aim for audio peaks that sit consistently between -12dB and -6dB. Recording too quietly is a common mistake that forces you to boost the volume later, which can amplify background noise.
- Capture Room Tone: Record 10 seconds of silence/ambient noise in the room. This sound sample is essential later for advanced noise reduction during editing.
During Recording
- Monitor Audio: Always wear your closed-back headphones to monitor your audio in real time.
- Keep Going: Don’t stop recording for small mistakes, filler words, or stumbles; you can easily edit these out later. Stopping mid-flow can make the conversation sound unnatural.
- Maintain Distance: Keep a consistent distance from the microphone throughout the entire recording session.
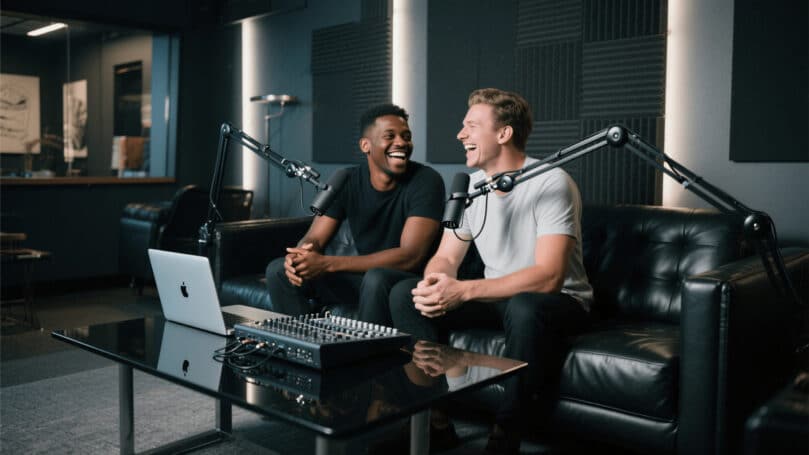
Recording Interviews or Multiple Guests
If you are recording locally with multiple guests, ensure every person has their own microphone and set up the software to record each person on separate tracks. This isolates each person’s audio, which is immensely helpful for editing and balancing volume later.
For remote interviews (online sessions), use dedicated tools that record high-quality audio individually:
- Remote Recording Tools: Consider using web-based tools like Riverside or SquadCast. These services automatically record both sides of the conversation on separate tracks.
- Backups: Always back up your recordings immediately.
Editing Your Podcast Like a Pro
Now it’s time to polish your raw audio into a professional product. A general rule of thumb many editors follow is a 2:1 ratio: A one-hour recording might take two hours to edit.
Essential Editing Steps
- Save Raw Files: Before making any edits, keep a backup of your original, unedited audio files.
- Clean the Track: Go through the recording and remove long gaps, filler words (“um,” “uh”), awkward pauses, and unwanted background noise. When editing long gaps, trimming the space between words can drastically improve the conversation flow.
- Apply Noise Reduction: Use the 10 seconds of room tone you recorded earlier. Most podcast recording software includes a noise reduction feature that uses this ‘silence sample’ to identify and remove white noise from the rest of the track.
- Balance Levels: Ensure consistent volume throughout the entire episode. If you recorded multiple guests on separate tracks, this is where you equalize their volumes so no one sounds louder or quieter than the host.
- Compression (Advanced): While complex, compression is vital. It helps to level out the audio dynamics, making the quiet parts louder and the loud parts quieter, resulting in a consistent listening volume. Look up tutorials specific to Audacity or GarageBand compression settings.
Adding Professional Touches
A well-structured episode uses musical elements to guide the listener.
- Intro Music: Your intro music should be brief (15–30 seconds). A common approach is to play the intro music at full volume for about 15 seconds, and then have it fade under your voice as the episode begins.
- Transitions: Use short musical stings or sound effects between segments or commercial breaks to clearly demarcate sections. You can find resources for music and sound effects (ensuring you check licenses) through libraries like the YouTube Audio Library.
- Outro: End the episode with a clear call to action (CTA), perhaps followed by a fading musical track.
Publishing Your Podcast to the World
Once your episode is edited and sounding pristine, it’s time to export and publish!
Export Settings for Podcasts
The format you choose impacts file size and compatibility.
- Format: Export your final file as an MP3. This format offers excellent compatibility across platforms and a manageable file size, unlike WAV files, which can be ten times larger and cause upload issues.
- Quality/Bitrate: For spoken word audio, a quality setting of 128–192 kbps is more than sufficient.
- Metadata: When exporting (especially in Audacity), fill out the metadata fields (artist name, episode title, description, and genre). This is vital for platforms like Spotify and Google Podcasts to correctly index your show.
How to Get Your Podcast Online
Your audio files need a home. This is where a podcast hosting platform comes in. The hosting platform stores your MP3 files, creates new episodes, adds show notes, generates a valid RSS feed, and often provides analytics.
- Choose a Hosting Platform: Popular choices include Anchor (free and simple, often used for hobby podcasts), Libsyn, Buzzsprout, and Transistor.
- Upload Your Episode: Upload your MP3 file, along with detailed show notes.
- Generate an RSS Feed: Your host automatically generates the necessary RSS feed. This feed is the central hub of your podcast.
- Submit to Directories: Once you have your RSS feed, you must submit it to major podcast directories. If you use a host like Anchor/Ponto FM, they may distribute automatically and send you notifications. If not, you must manually submit the RSS feed URL to key platforms:
- Apple Podcasts: This is essential, as many secondary players (like Overcast and Pocket Casts) use Apple’s directory as their master copy.
- Spotify: A major player in the podcast space.
- Google Podcasts/YouTube Music: Ensure you submit to Google’s updated directory.
Level Up Your Podcasting Game: Courses to Help You Go From Beginner to Legend
You’ve got the basics down, but now you’re hungry for more. You want to create the kind of podcast that makes people cancel their plans just to hear your next episode. The kind that gets shared in group chats and quoted at dinner parties.
Here’s the exciting part: You don’t need to figure this out through months of trial and error. You can refine your skills and accelerate your growth!
These Udemy courses are your secret allies:
- The Podcast Masterclass: The Complete Guide to Podcasting
- Podcast Masterclass: The Essentials for Podcast Success
- Podcast Mastery 2025
These podcast courses can help you move past technical struggles faster and focus on what truly matters: your content.
