Article Summary
Customizing the Photoshop interface means tailoring your workspace—panels, toolbar, color scheme, and layout—to fit your workflow. This article covers moving and docking panels, removing clutter, changing UI colors, and saving your workspace. You'll gain a cleaner, more efficient setup that keeps your canvas front and center.
Photoshop’s interface can feel overwhelming. There’s so much to look at! But if you know where to focus your attention, everything becomes much easier. Let’s strip away all that complexity and get you up and running with Photoshop basics with this step-by-step guide.
Once you open Photoshop, use Ctrl+N to create any project. Officially this is called the Workspace, but let’s see what you actually need to know.
Recommended Udemy course

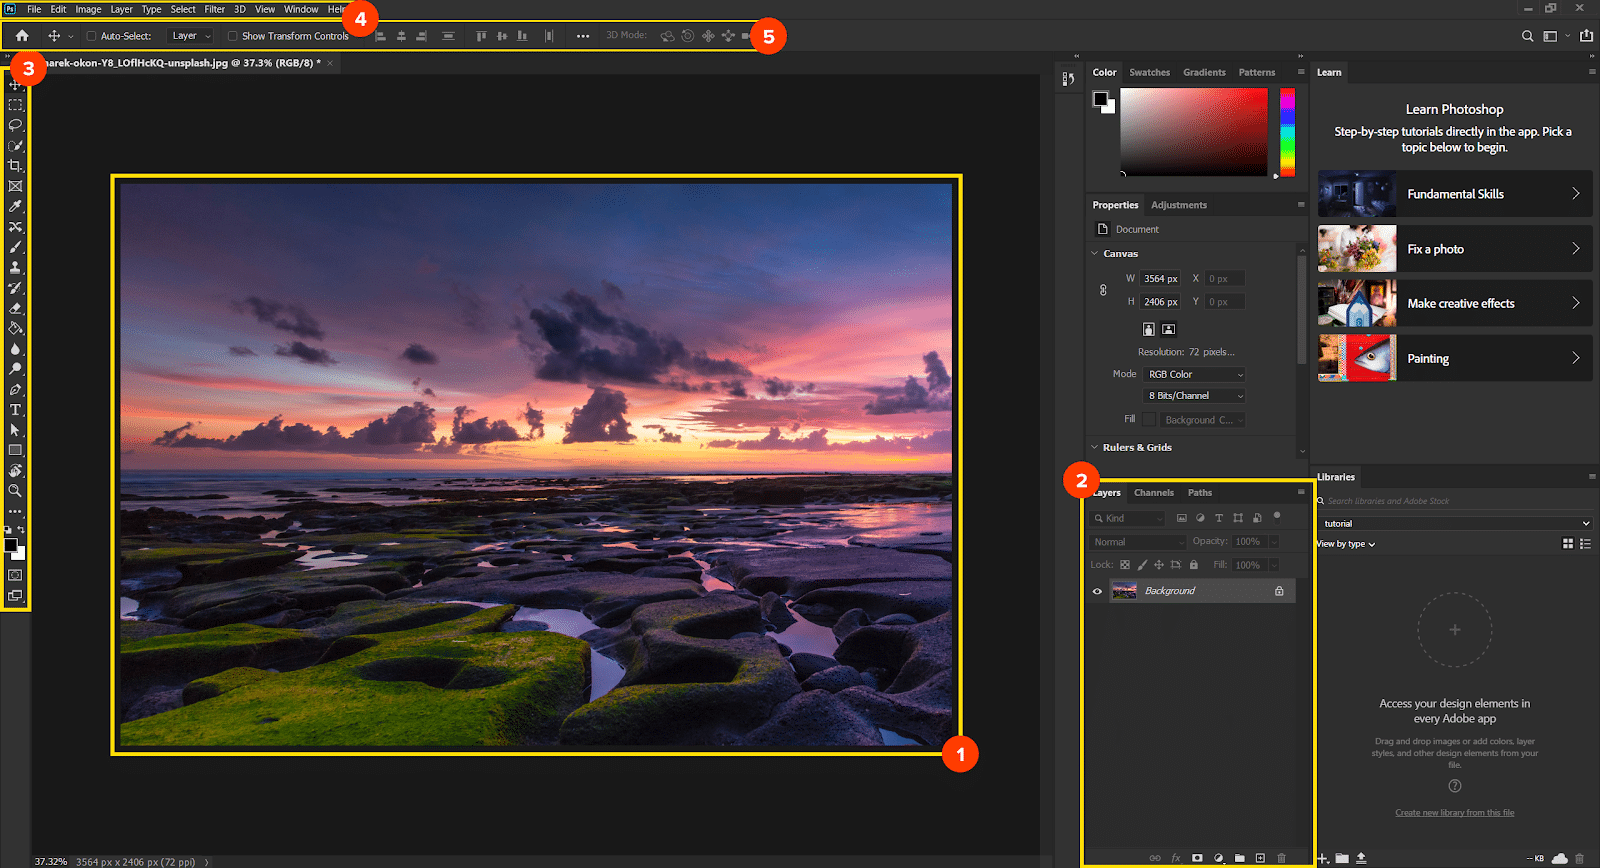
Important pieces of the Photoshop workspace
- The Canvas
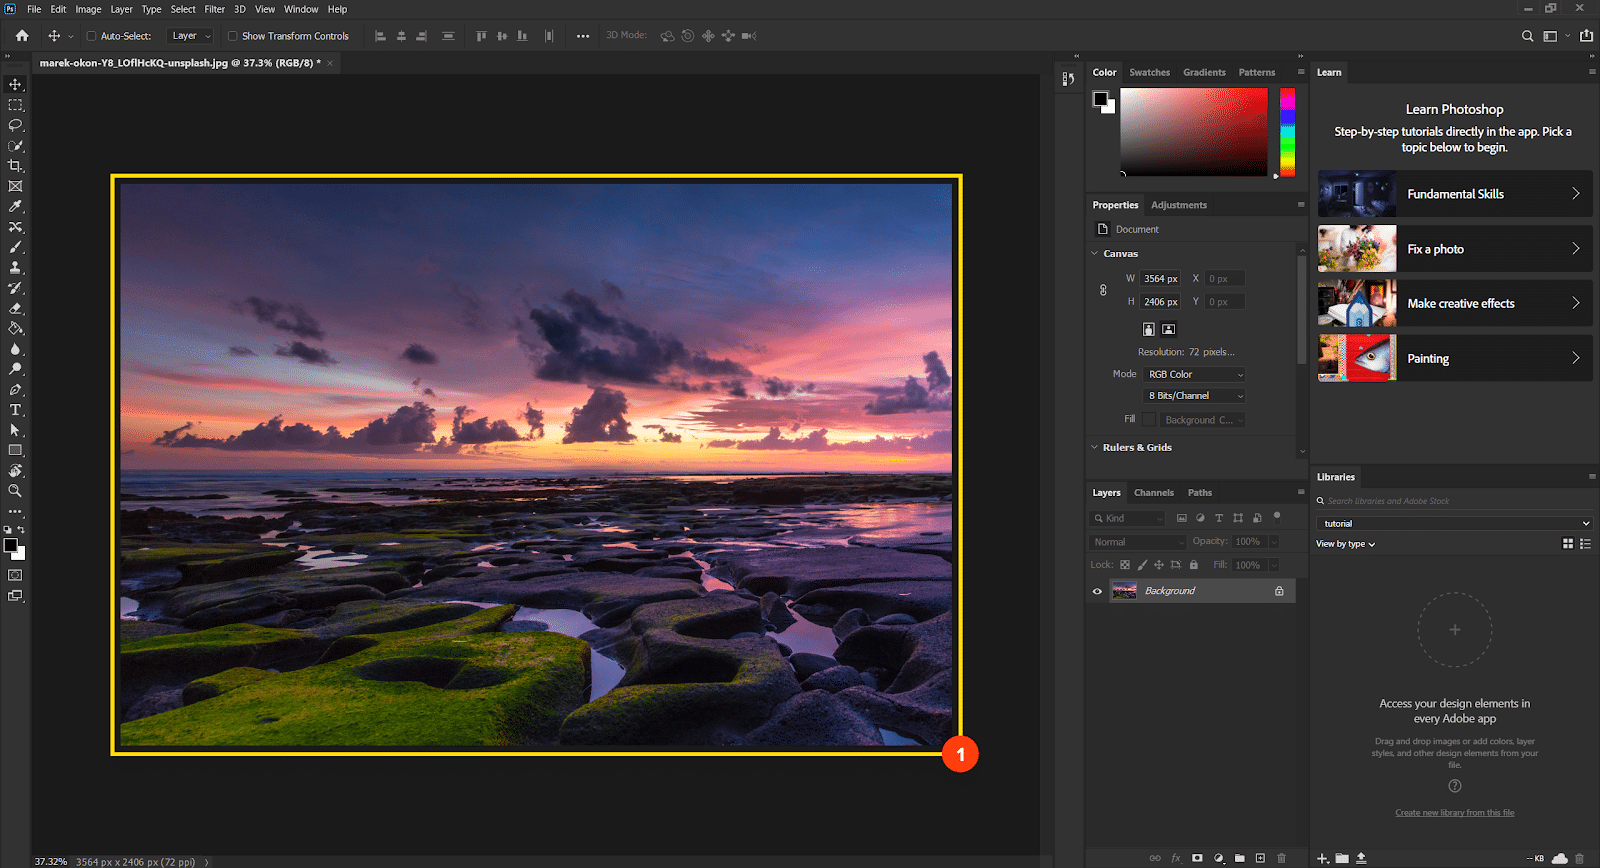
The most important part in Photoshop’s interface is the canvas, where everything happens. This is where you draw, paint, or design, and it’s where you should focus 90% of the time. All your images in Photoshop are going to show up here and you can do all sorts of image editing!
- The Layers panel
Directly related to the canvas we have the Layers panel. You can see it on the right side of your screen, but in case you don’t have it there, Window in the main menu -> Layers. Everything you place on the canvas will show up in the Layers panel. Currently, we have a single layer called Background laid out on the canvas. These two elements are connected and you can’t use one without the other.
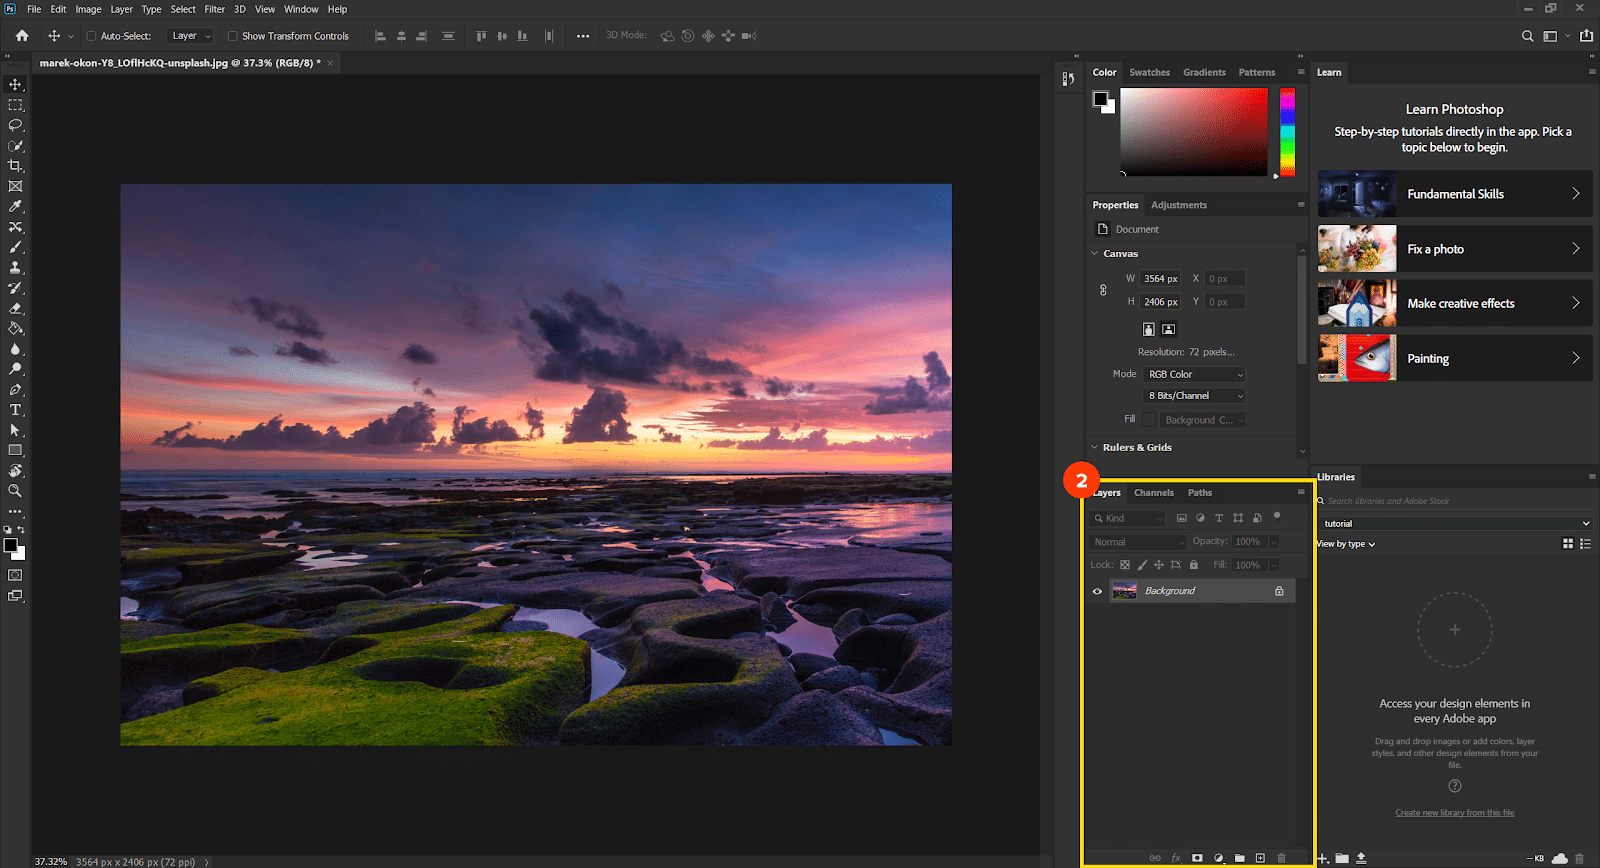
If you think of driving, you can consider the canvas like your windshield. Through it, you can see the most important thing – the road. In our case, the road is this image. The Layers panel is the dashboard where you can see information like speed, fuel level, etc. The Layers panel shows various pieces of information regarding what’s happening on the canvas.
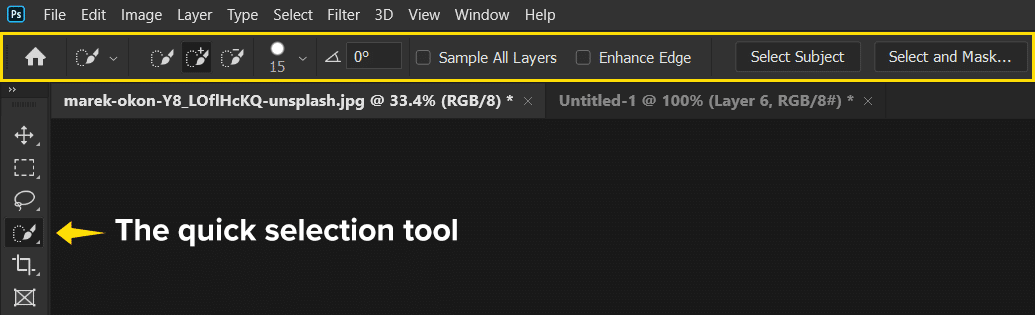
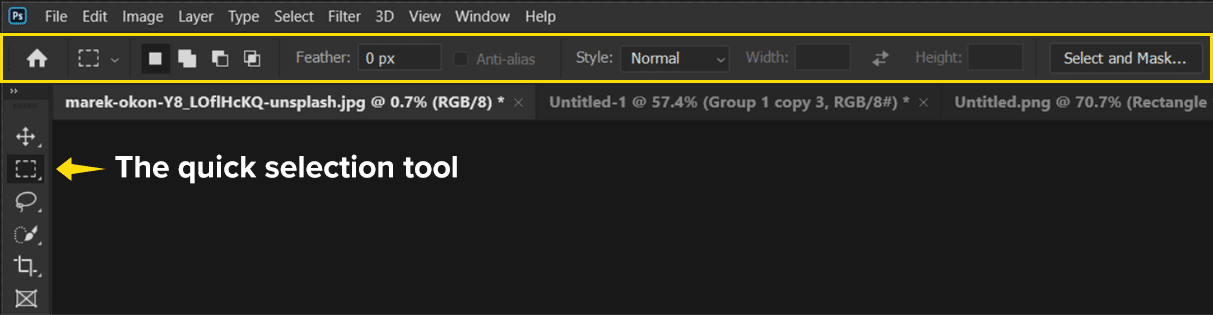
- The toolbar
On the left side of your workspace, you have your toolbar. This is where you find things like the brush tool, the crop tool, the move tool, the zoom tool, the type tool, the eyedropper, the eraser, and so on.
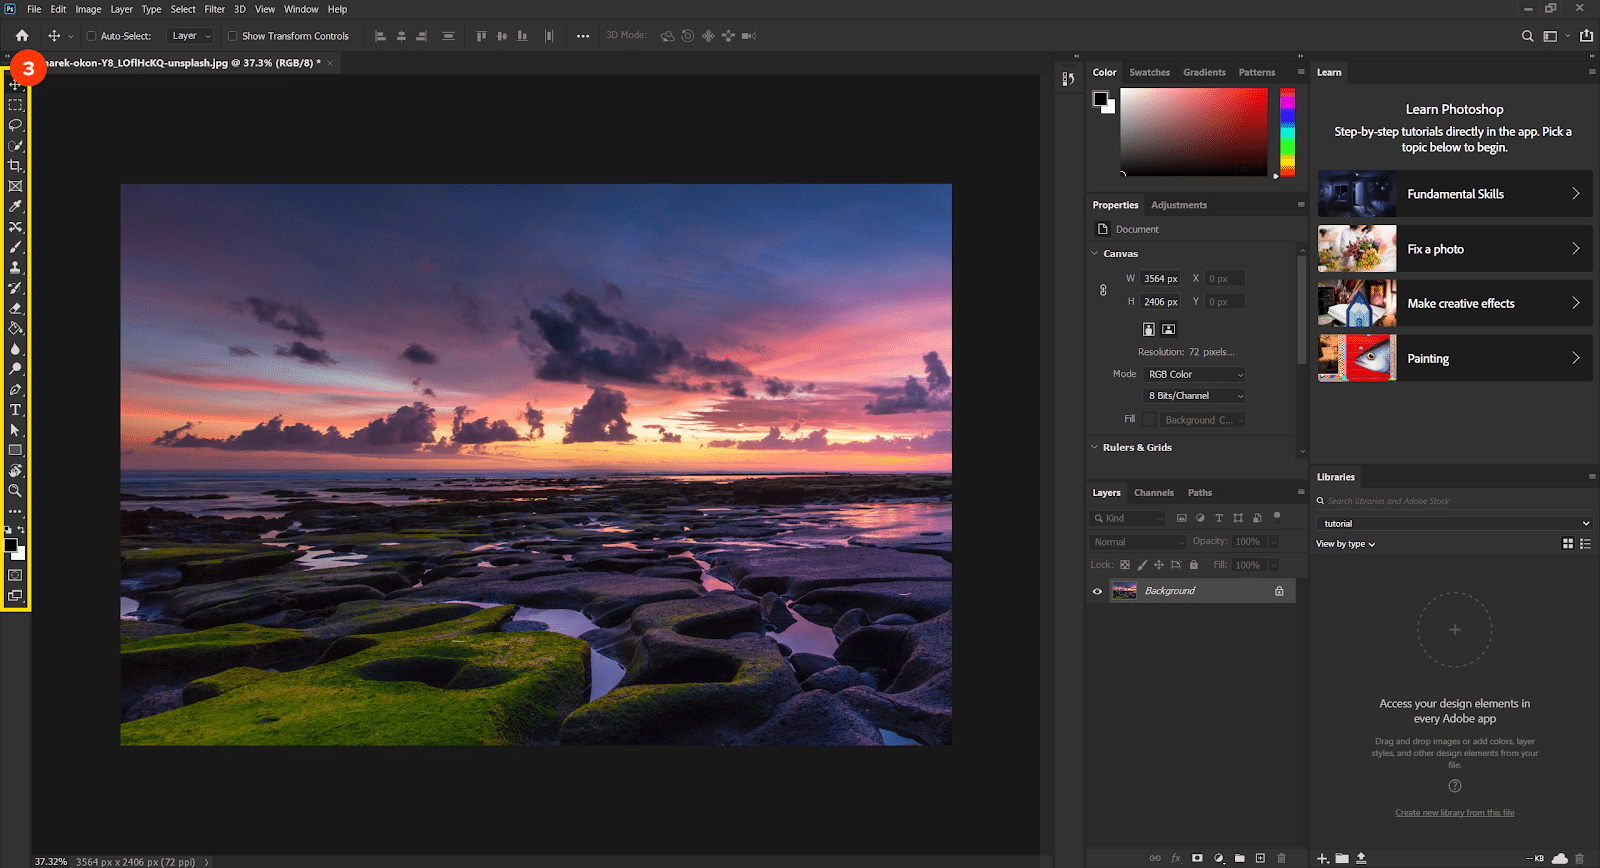
This area of Photoshop should be accessed 90% of the time by using your hotkeys. It’s more efficient to hit B to enable your brush tool rather than moving your mouse cursor all the way to the left. Because the canvas is the most important element, you’ll want to keep your mouse cursor above it as much as possible.
4. The main menu
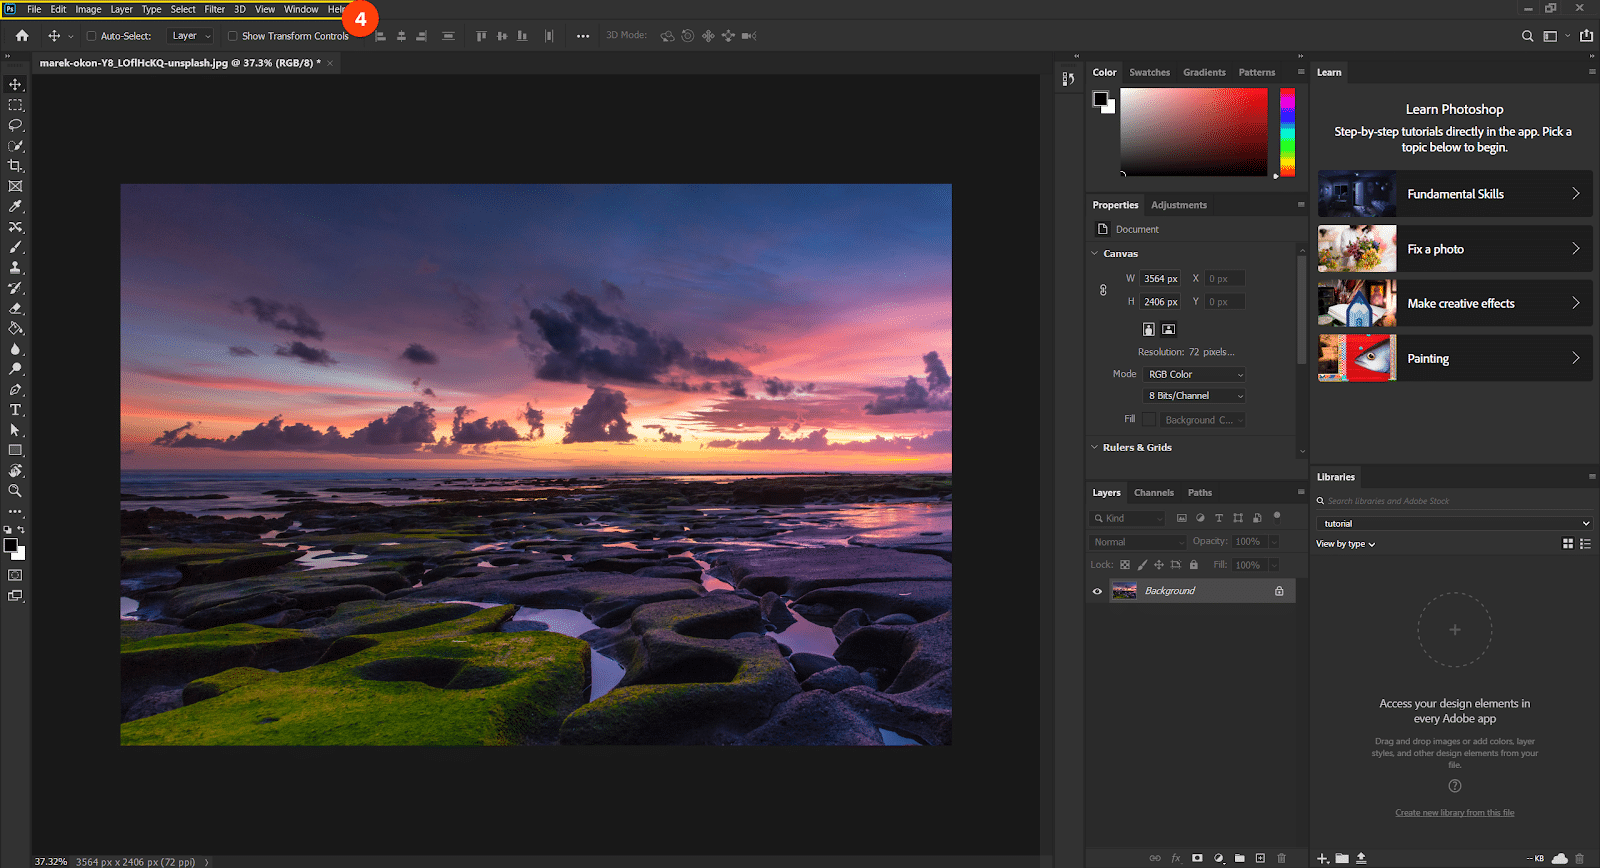
At the top of Adobe Photoshop, we have the main menu system which contains all sorts of options and features. In your everyday projects, you’ll use it from time to time, but the most important actions have hotkeys and it’s faster to use those rather than the menus. Your version of Photoshop doesn’t matter as this menu bar has always been at the top of the program.
5. The options bar
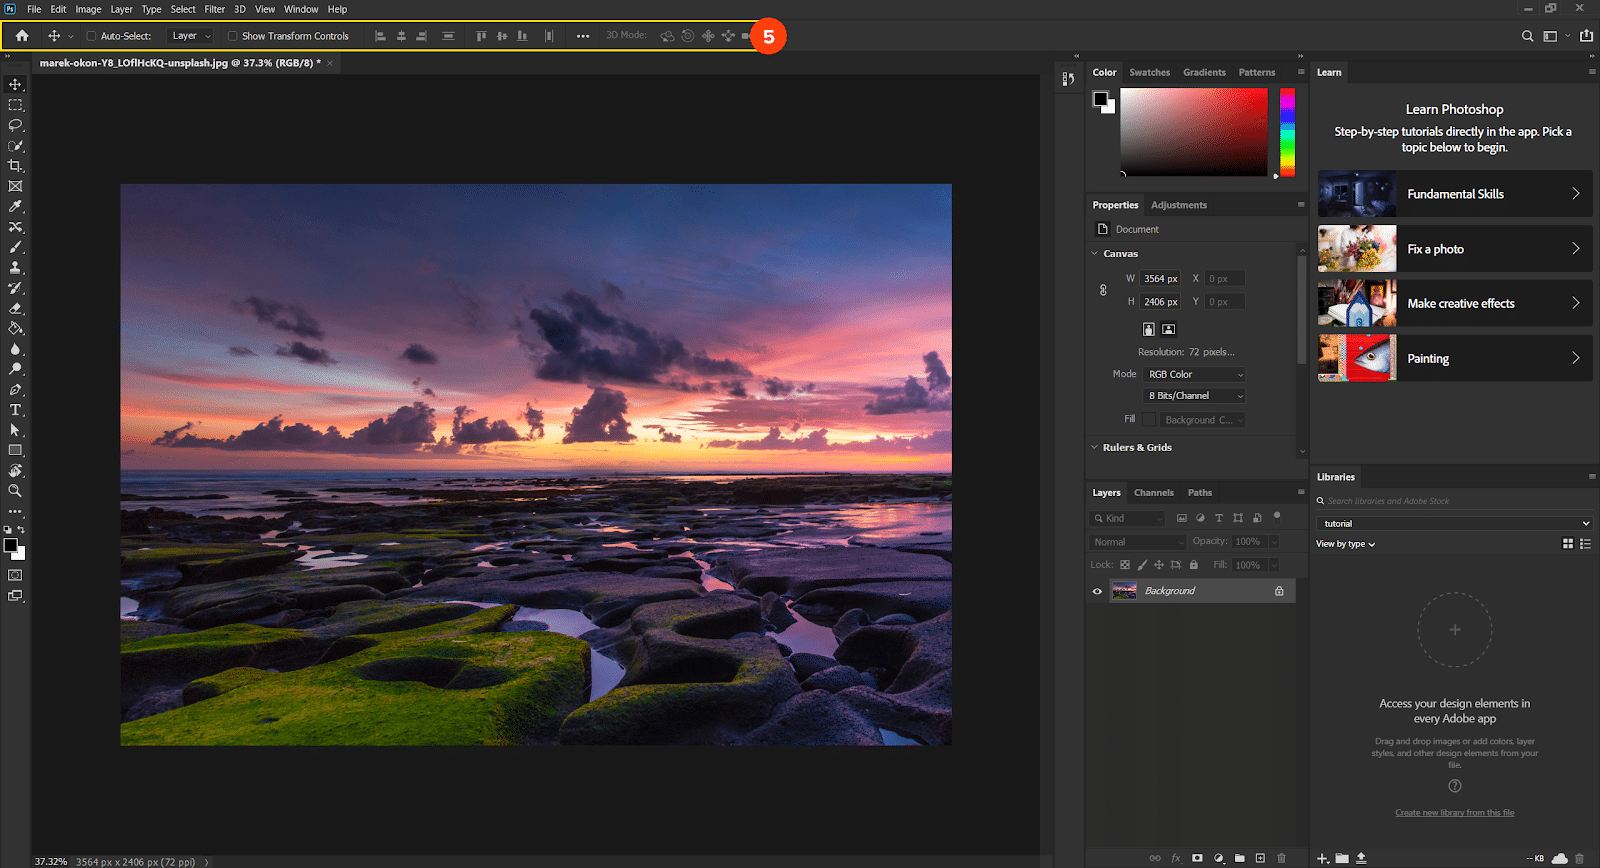 Directly underneath the main menu, we have the options bar which changes constantly depending on what tool you have selected. In this case, we have the move tool active, so the options bar shows us related move settings.
As you click on other tools, this area changes. Basically, this is where you can see and modify the settings for each tool.

How to customize the Photoshop interface
In Photoshop, all the panels together make up your workspace which is adjustable in any number of ways.
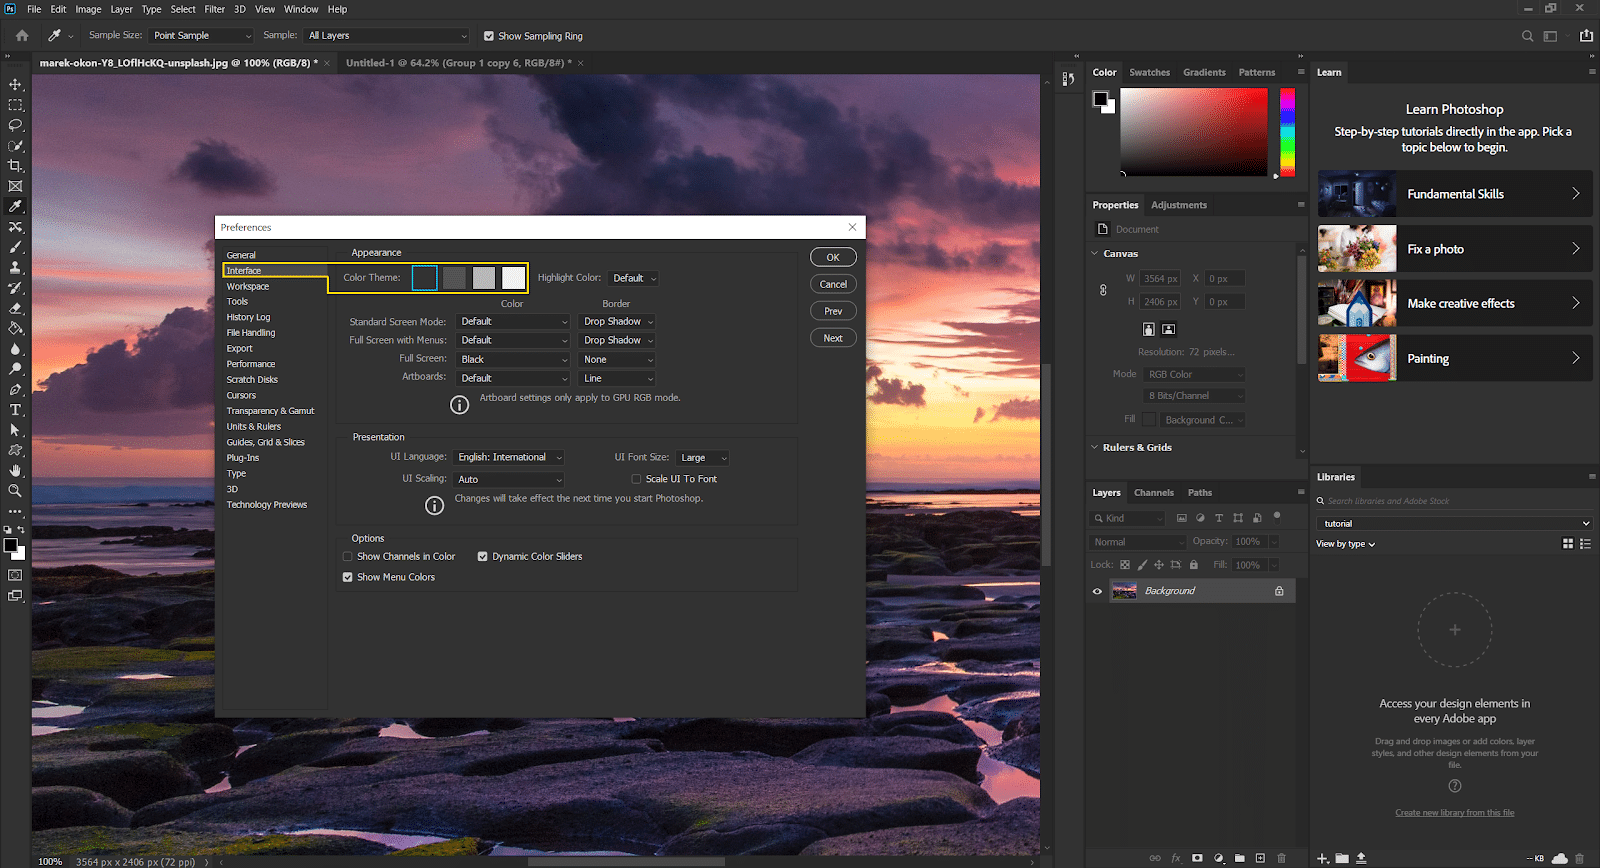
First, you can change the color of the program. Use Control+K to open up your preferences. From this new window, choose Interface. In total, you have four color schemes. Click on any of them and you’ll see the changes immediately. I personally prefer the darkest one.
Reset your interface
Photoshop comes with some workspaces already built-in. If we click on this icon on the top right side, you’ll see several options: Essentials, 3D, Graphic and Web, and so on. Click through them and notice how your interface changes.
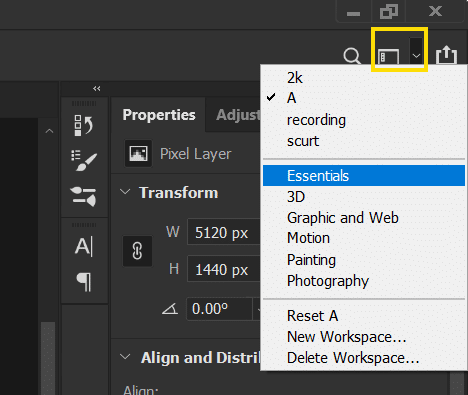
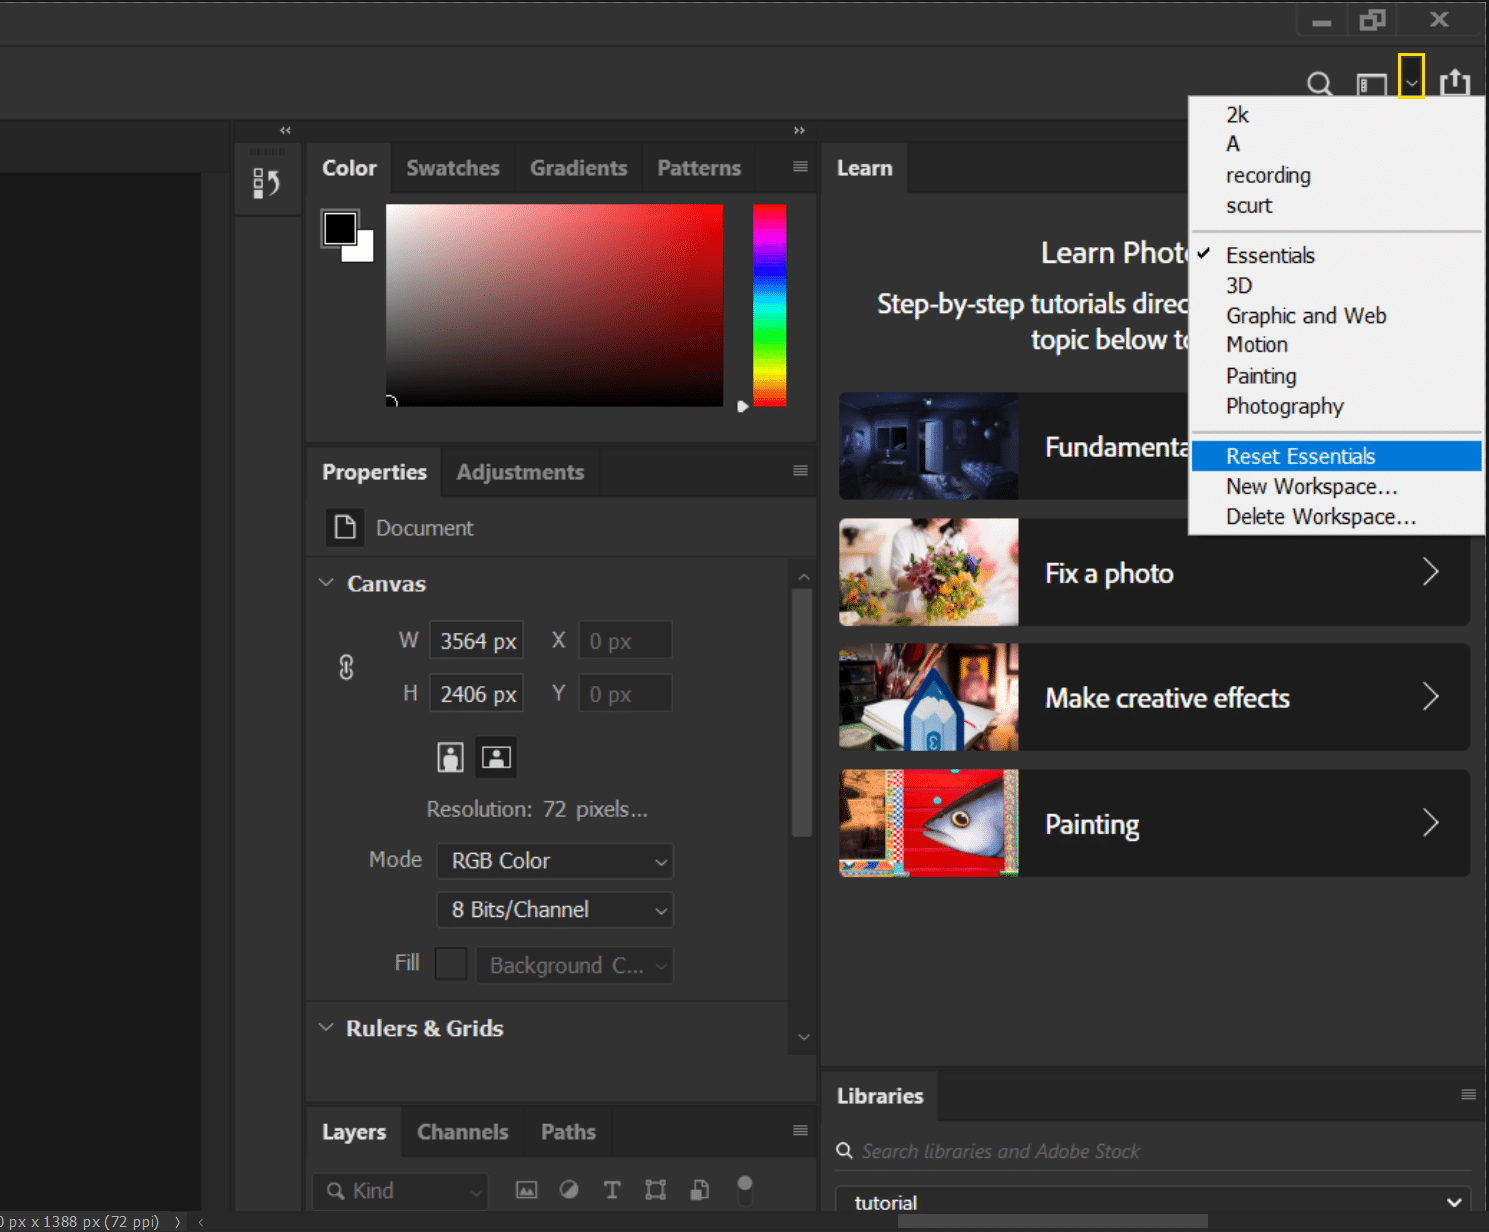
I recommend we start with Essentials so we can customize our interface together. In case your Photoshop looks different, let’s go to the top right and hit Reset Essentials. This way, we’ll throw away any changes.
One thing to know about customizing Photoshop’s interface is that all panels can be detached.
Customize the toolbar
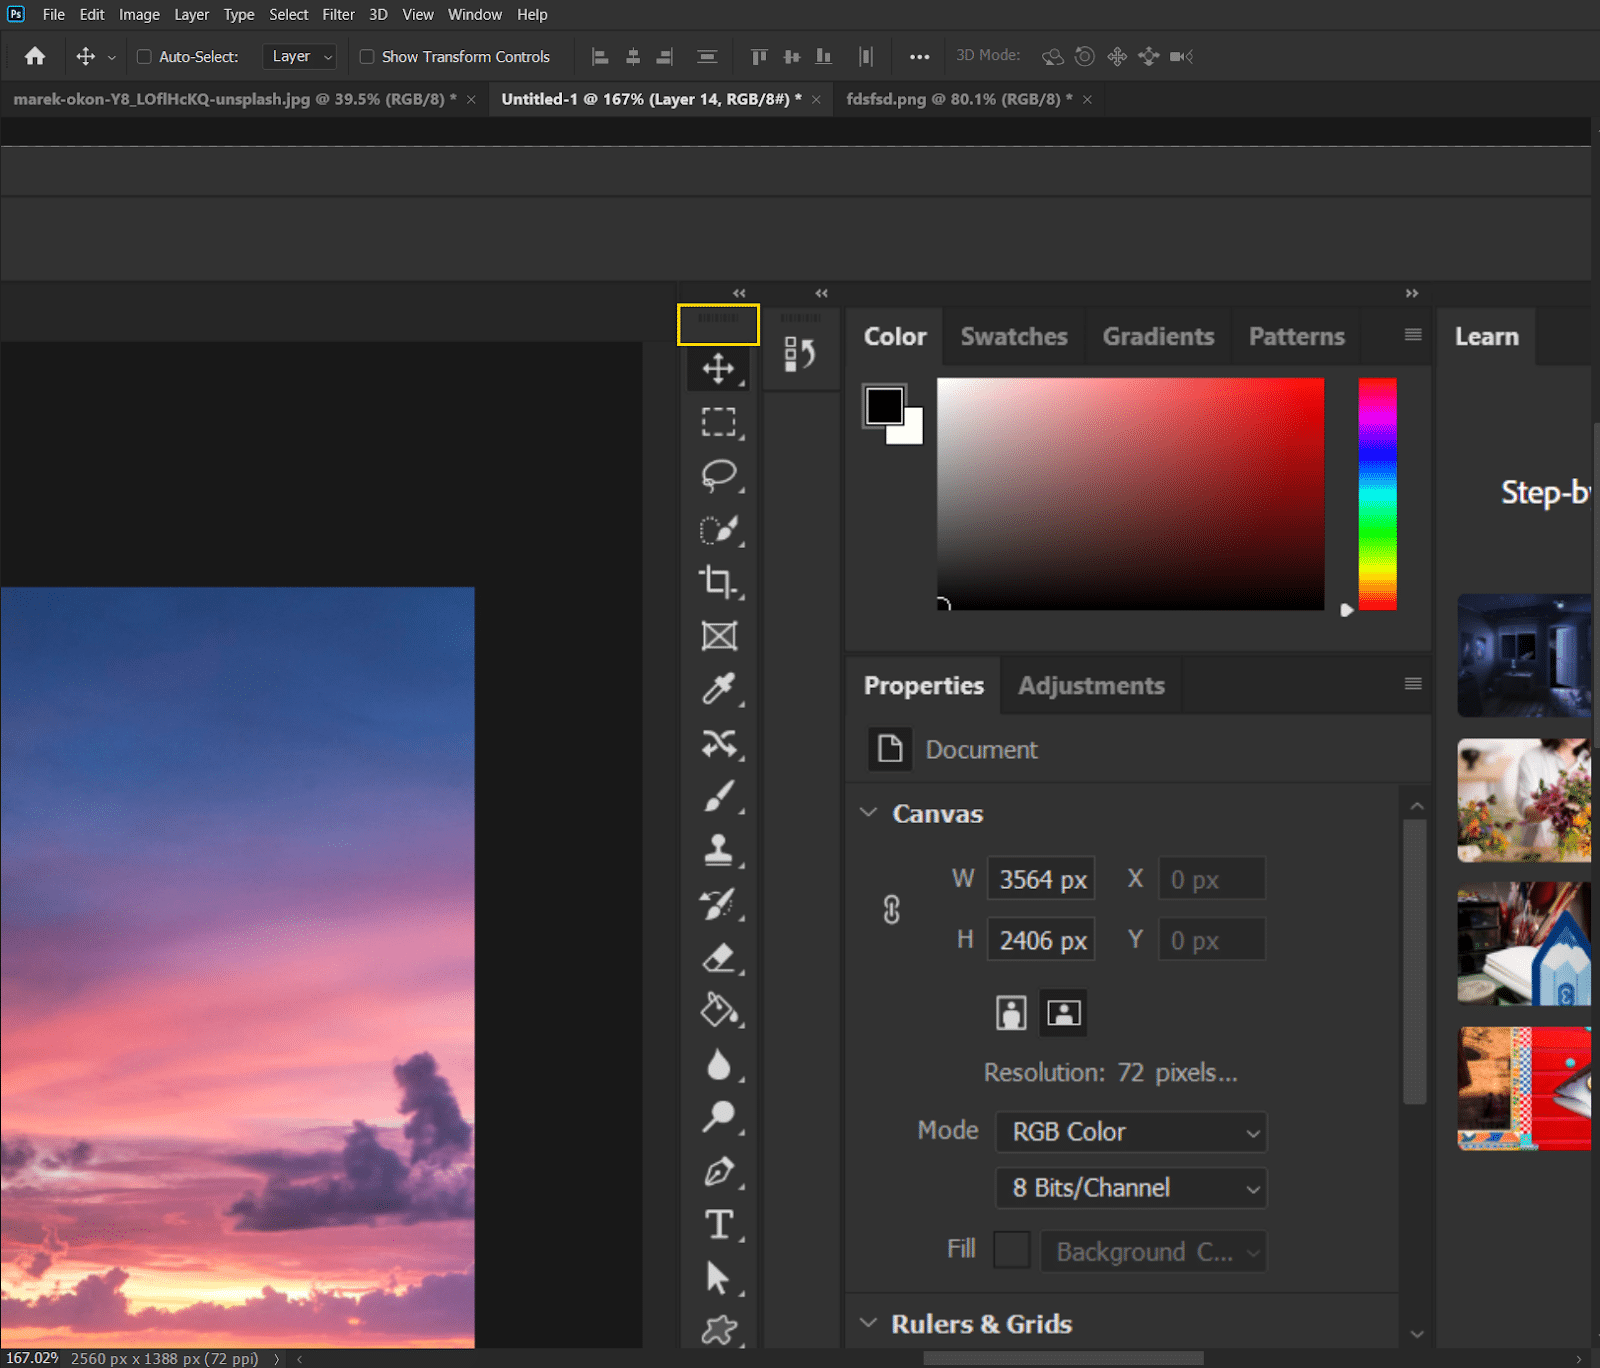
The toolbar is placed, by default, on the left side. If you go to the top of it, click and drag, you’ll see it’s now detached from that side. If you want to open up your color picker, click on the color swatches (black or white shown in the image below) from the bottom of the toolbar.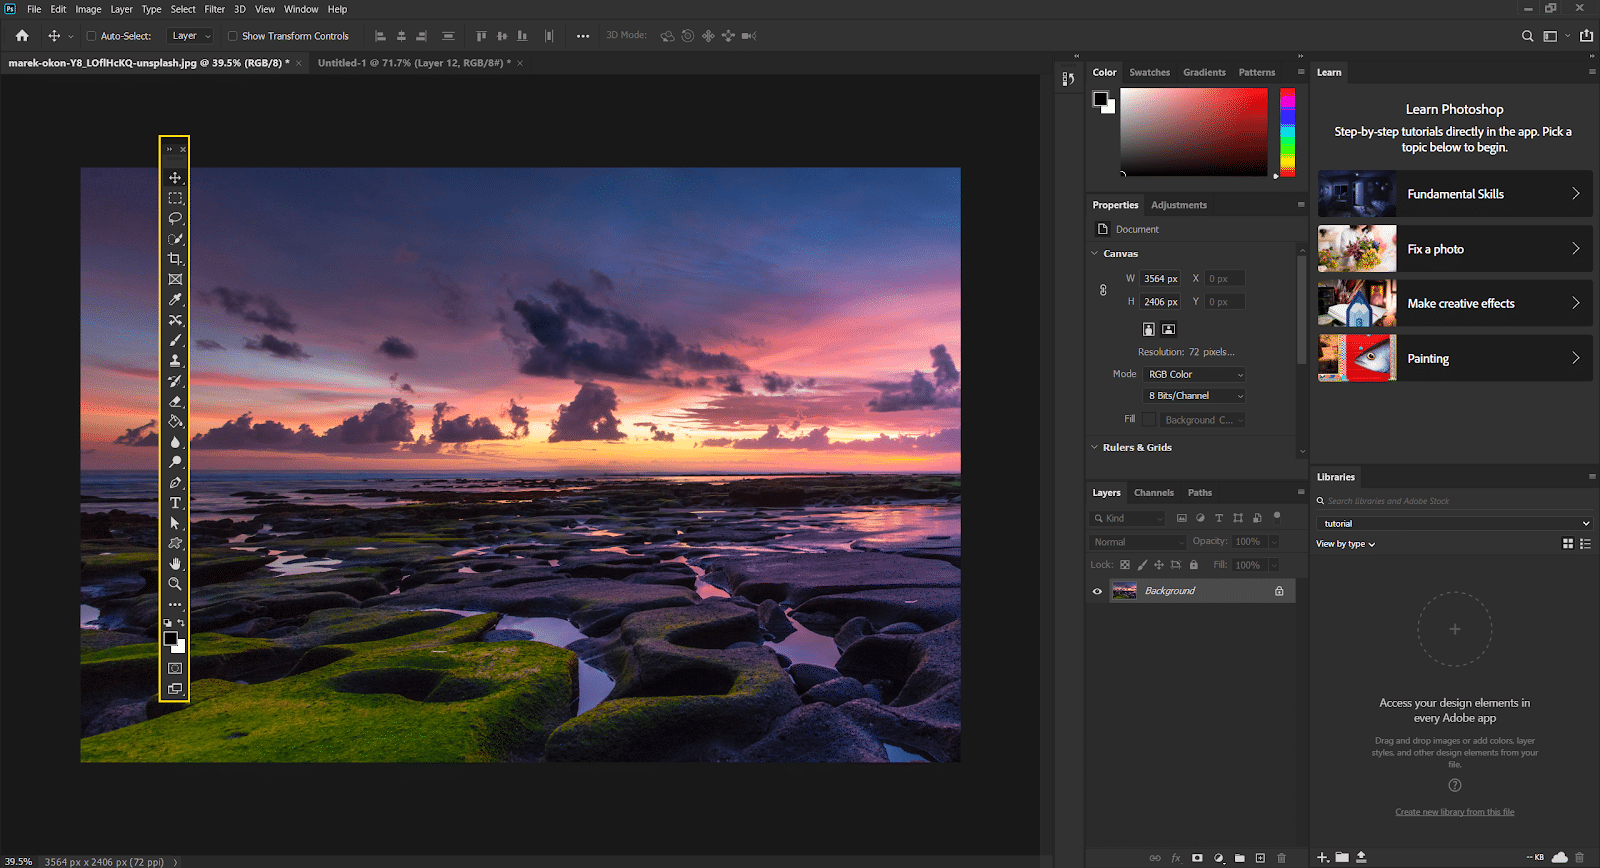
You can leave it floating about or you can attach it to the right side. To attach the toolbar to the right side, drag it across and without letting go, move it until you see a blue line show up.
This means you can dock it in that position. Release the mouse click.
I personally don’t like it there so let’s bring it back to the left side. Please note that you have to grab it from this top section, otherwise it won’t detach.
Opening and closing panels
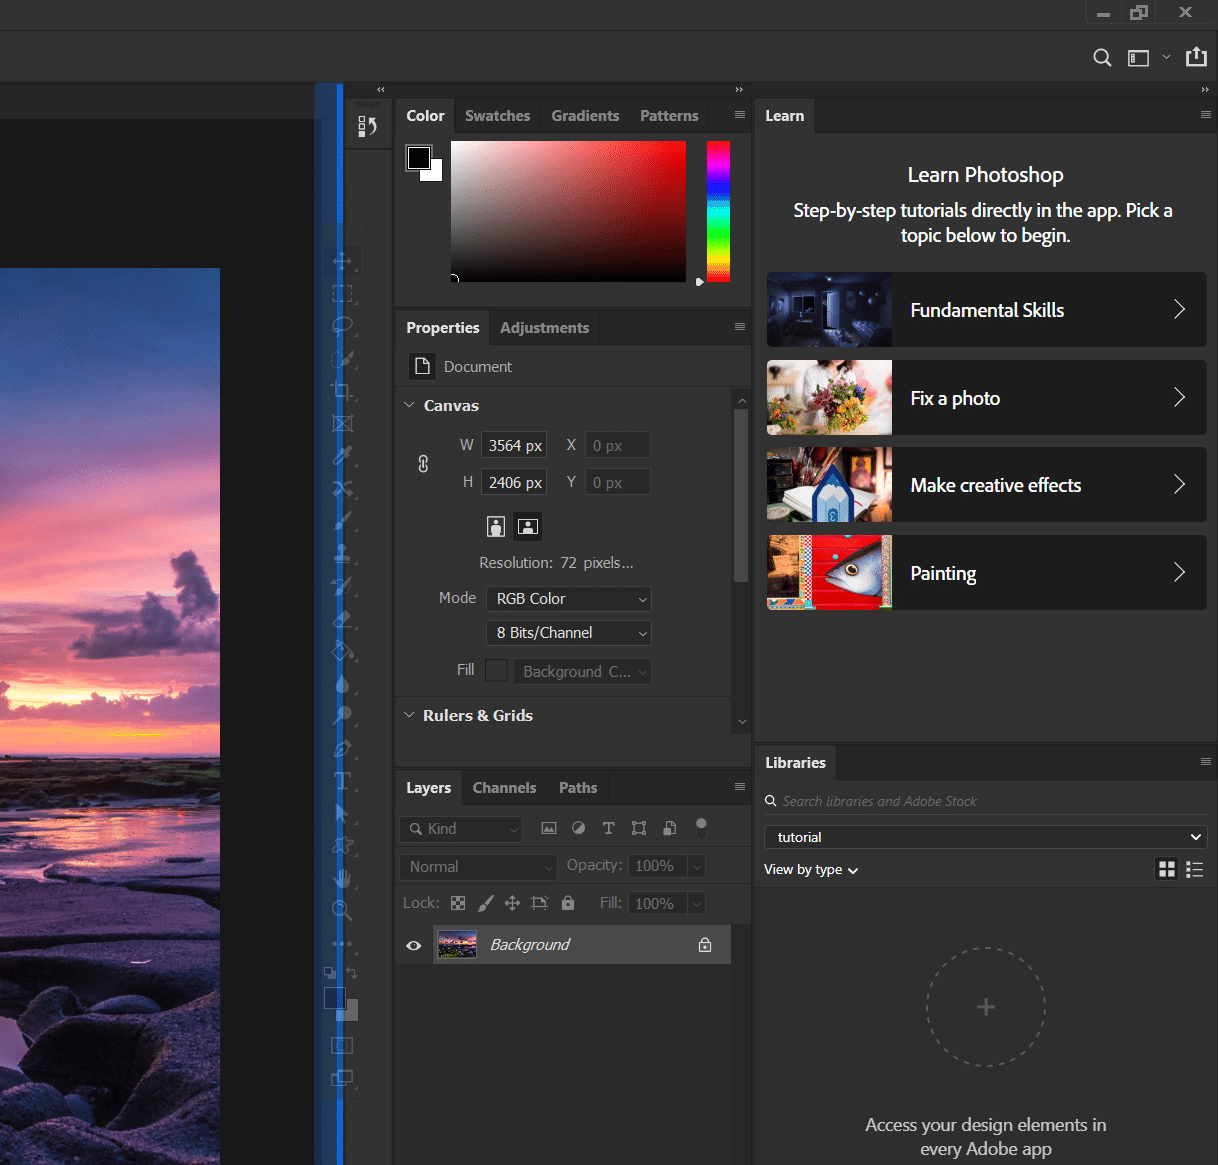
Regarding the other panels, they work the same as the toolbar and can be detached or reattached just about anywhere. Take the Libraries panel, I currently have it placed on the right side but I no longer want it there. No problem, I drag it from that position and drop it in this narrow column.

Repeat the process with the Learn panel and that whole area will disappear. This is important because you gain much more room for the canvas. In case you ever want to use these panels, you can simply click on them to expand them.
Notice how the Libraries panel is opened, but it’s much more compact.
You can enable other panels for this section. These are shown when you use the Window menu from up top.
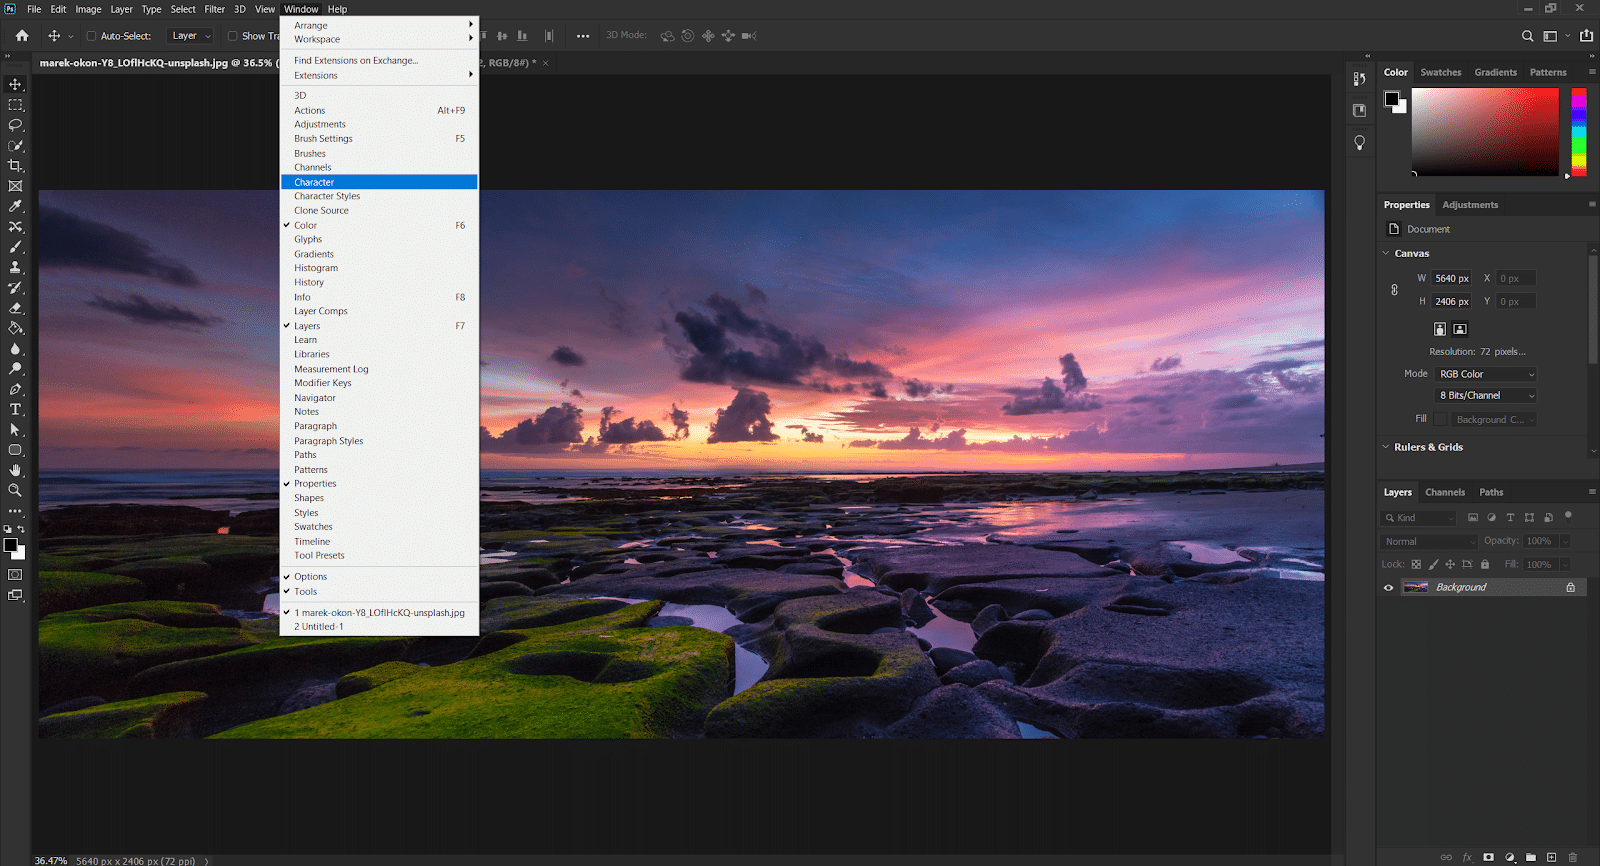
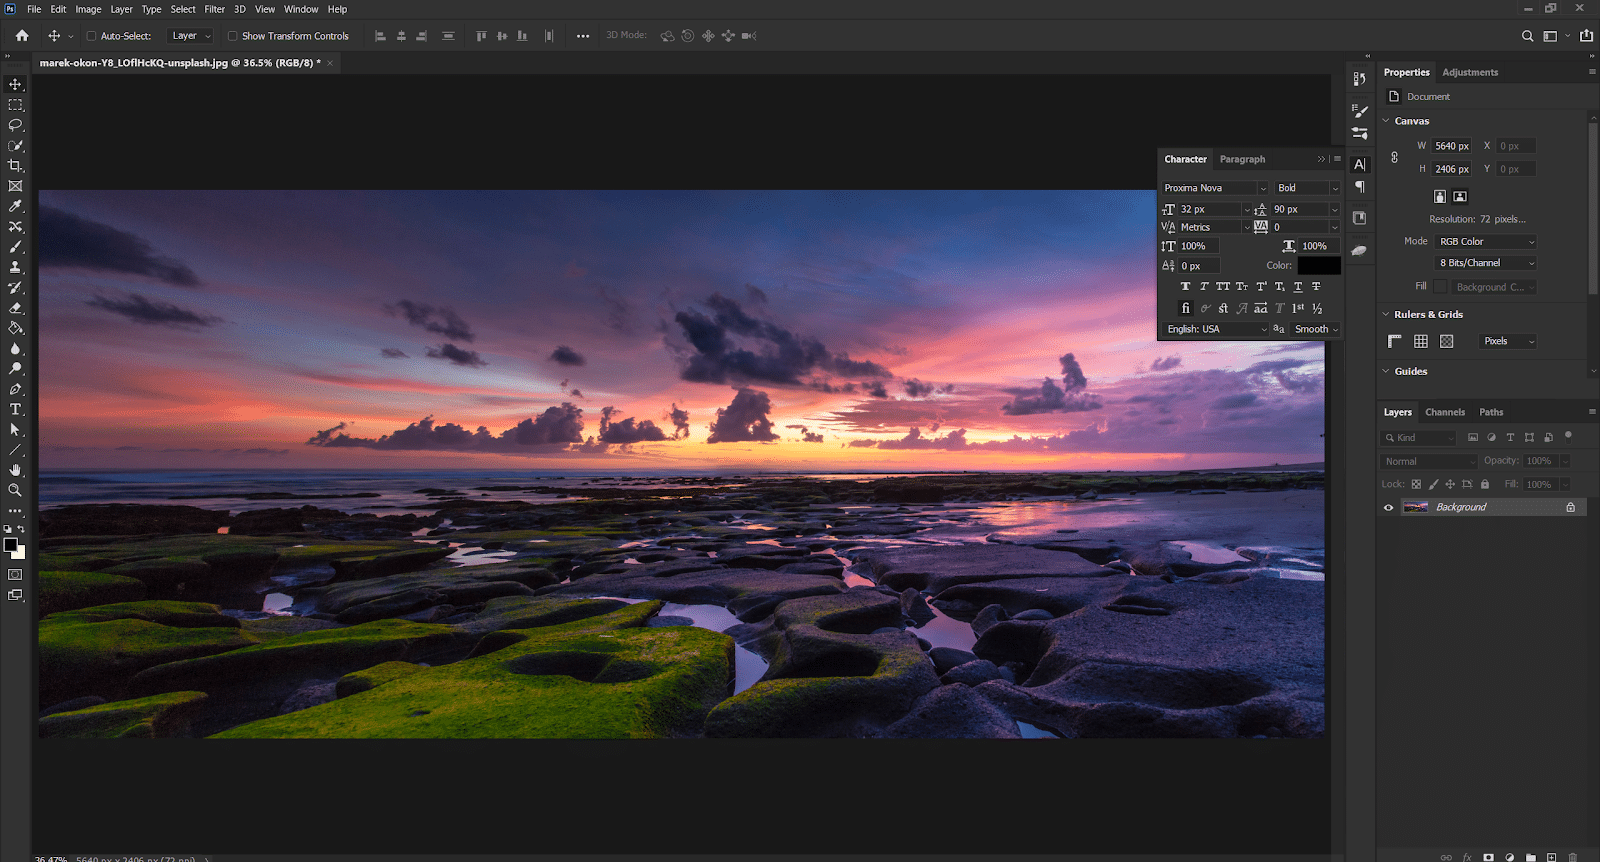
You can activate any one of these panels at any moment. Say I enable Character.
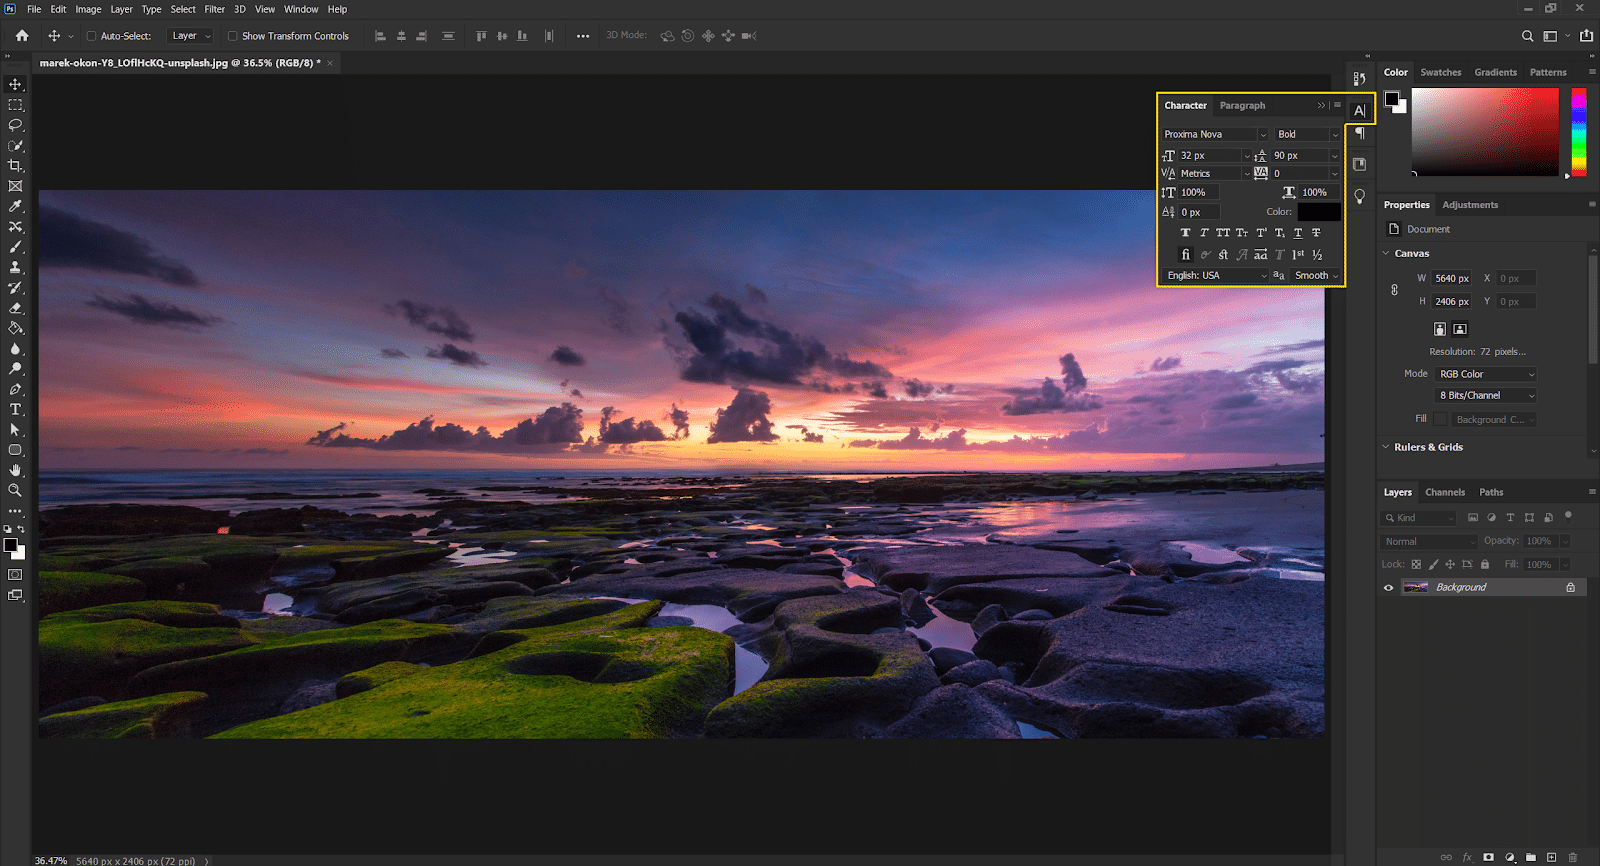
It just popped up in this narrow column. There’s one essential thing you have to realize — space is precious on your Photoshop interface. As you add more panels, the space for your canvas shrinks, which doesn’t make for a great experience. Remember your canvas is your windshield, your road. All the panels in your interface are supporting elements, they’re never the hero of your project so make sure you’re picky about what panels should stay expanded.
Removing Panels in Photoshop
Removing panels is one of those Photoshop basics that you have to master. Clutter is never welcome, so let’s trim everything down. For example, I don’t suggest you keep the color and swatches panels as they’re rarely used. Instead of removing them one by one, here’s what you can do:
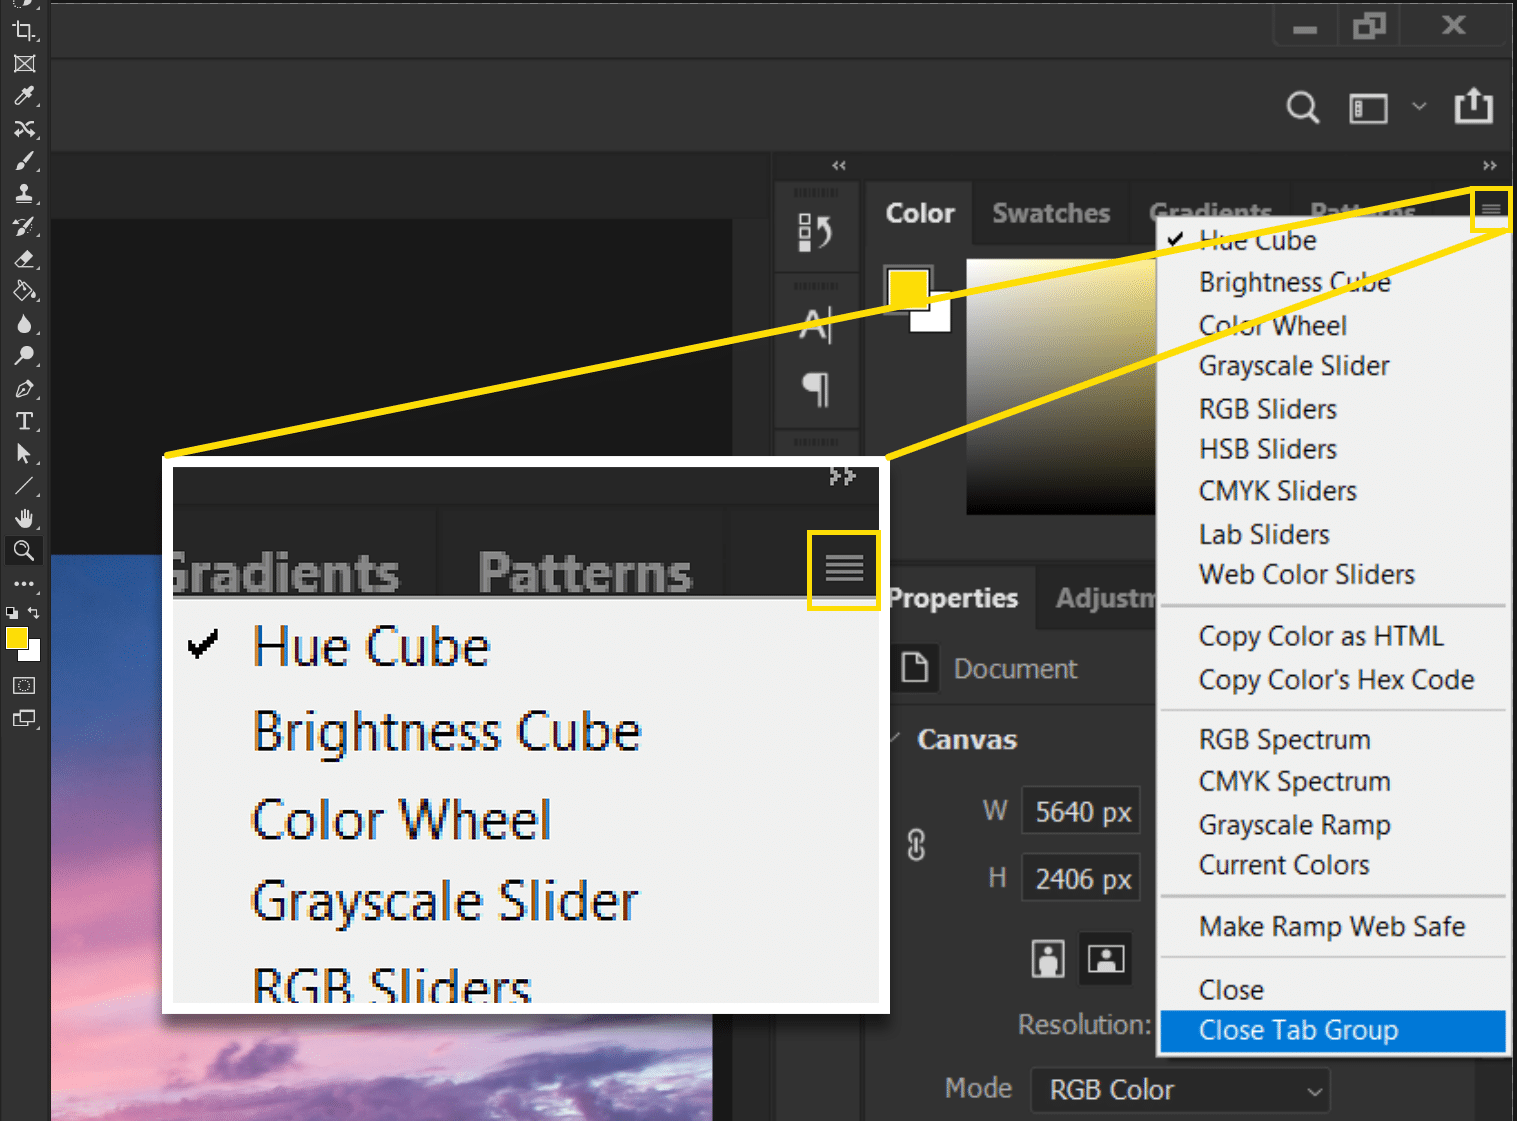
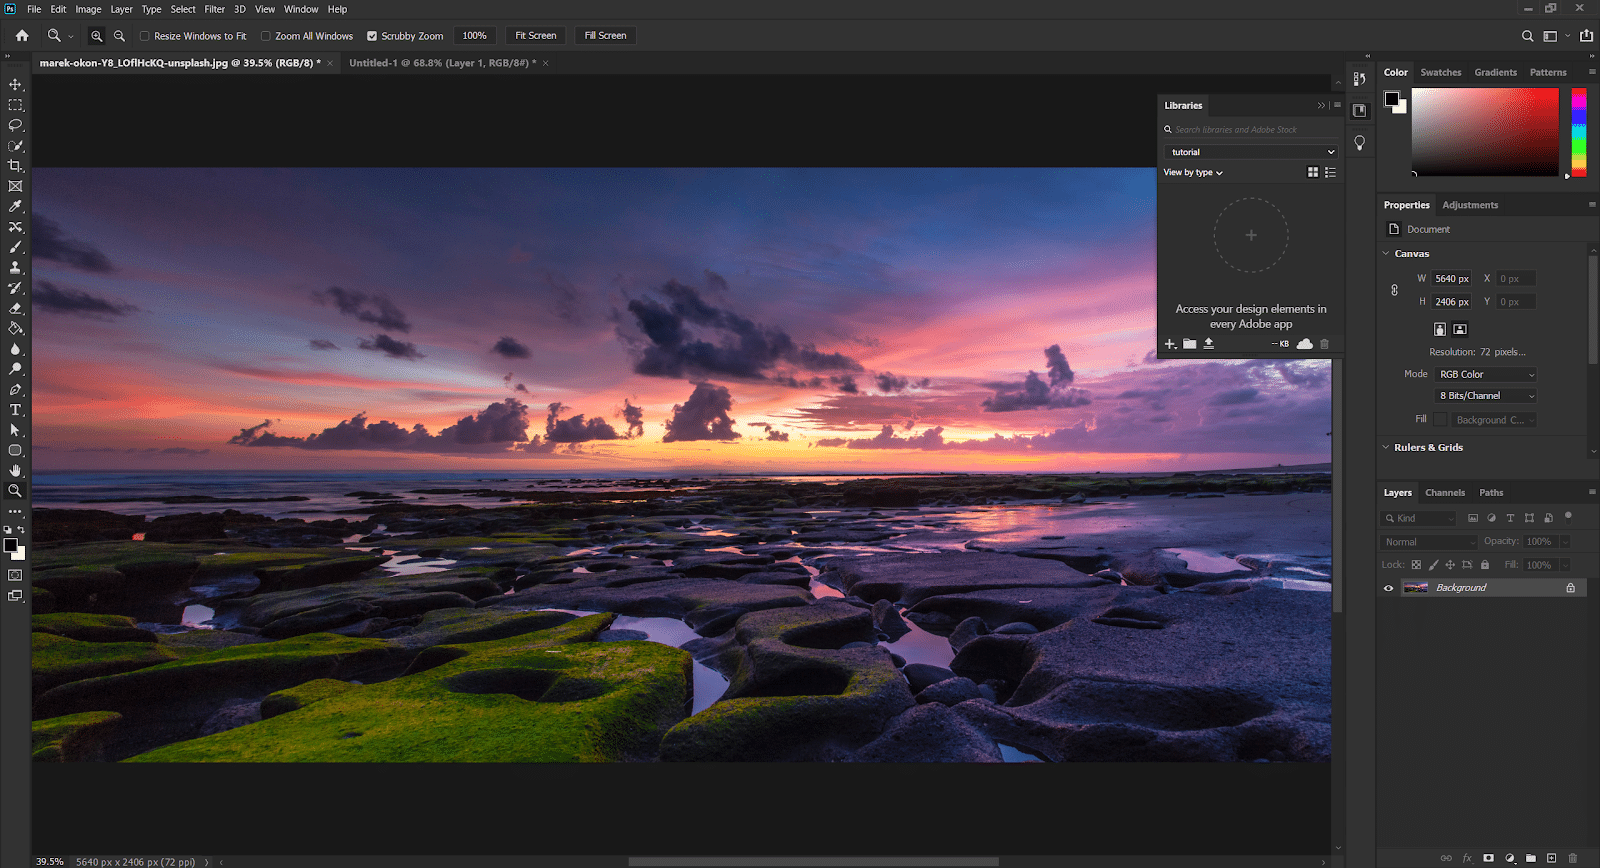
Click on this tiny icon in the top right. From this list, choose Close Tab Group. Now both tabs went away. Repeat the process. Now the Layers panel occupies this entire space, which is what I want.
Change the background color
Regarding our canvas, we can see it’s surrounded by a dark color. When working on a project with a black background, it can be difficult to see.
Change the background color by right-clicking anywhere outside your canvas. You’ll see several background options.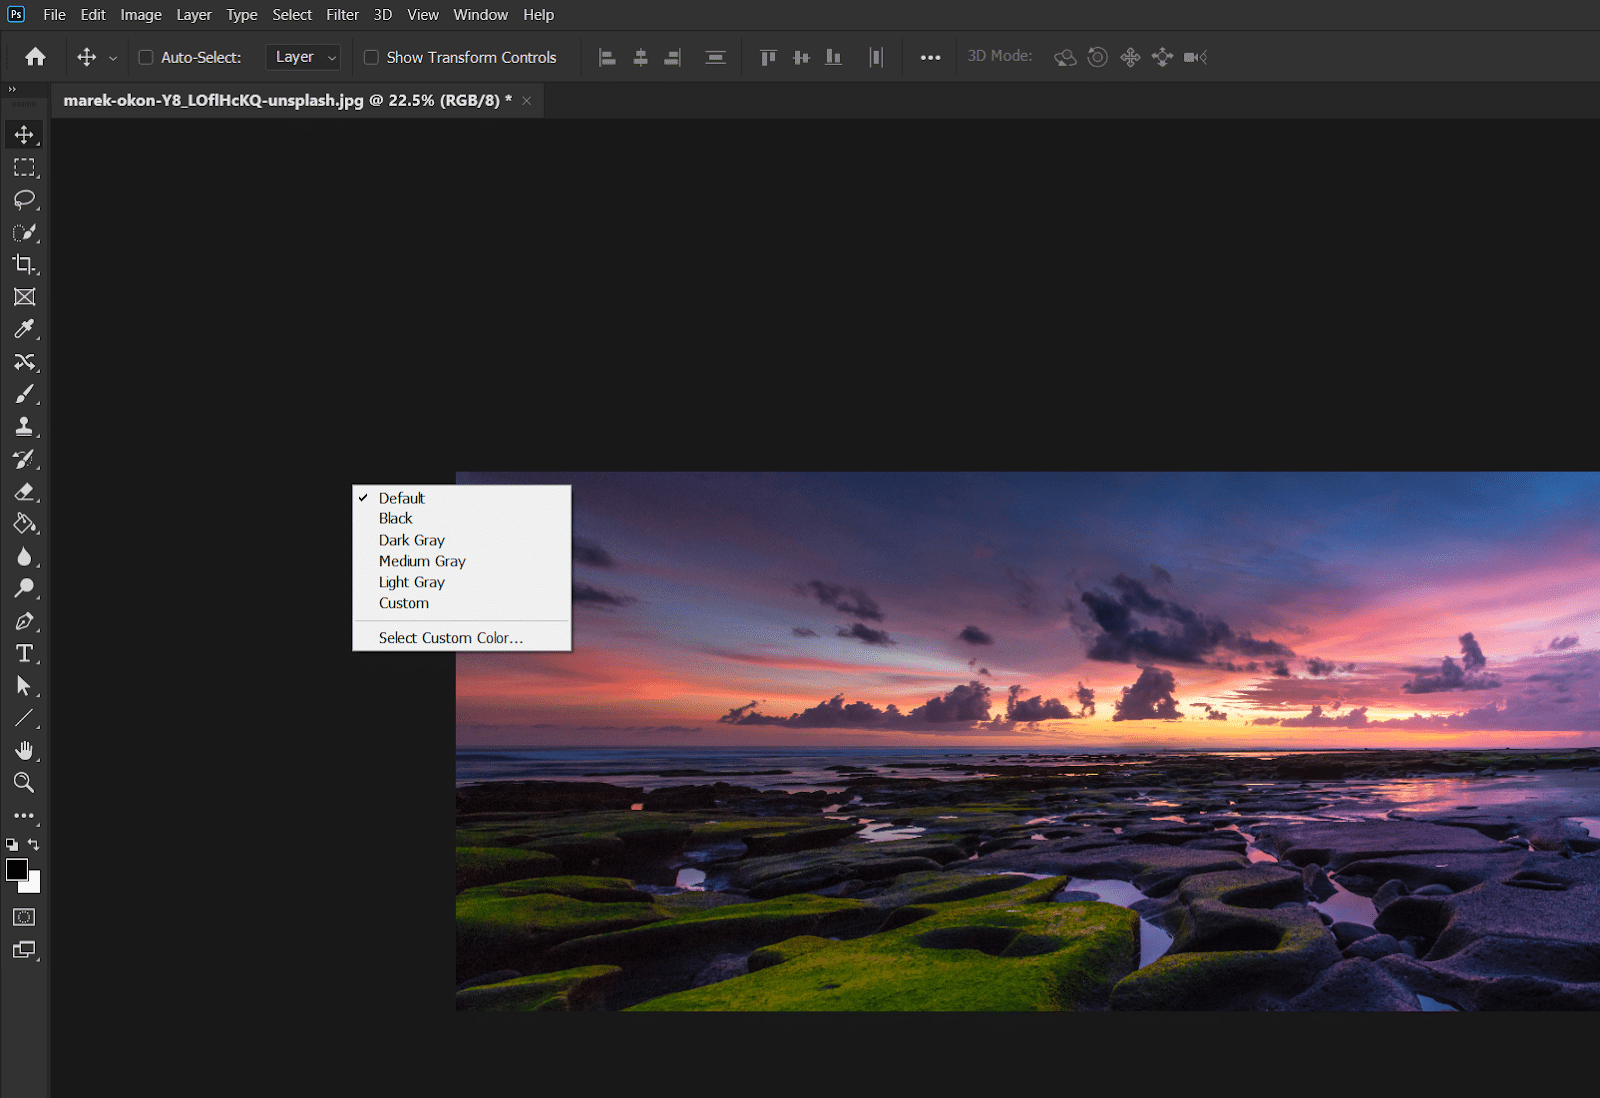
Try some of them out and see if they’re more to your liking. What’s nice is that you can input your own custom color, which is the last option on the list.
Saving your workspace
Saving your workspace is useful in case another user changes your arrangement dramatically. A saved workspace prevents you from manually putting everything back. To save your workspace click on the icon to the right of the magnifying glass.
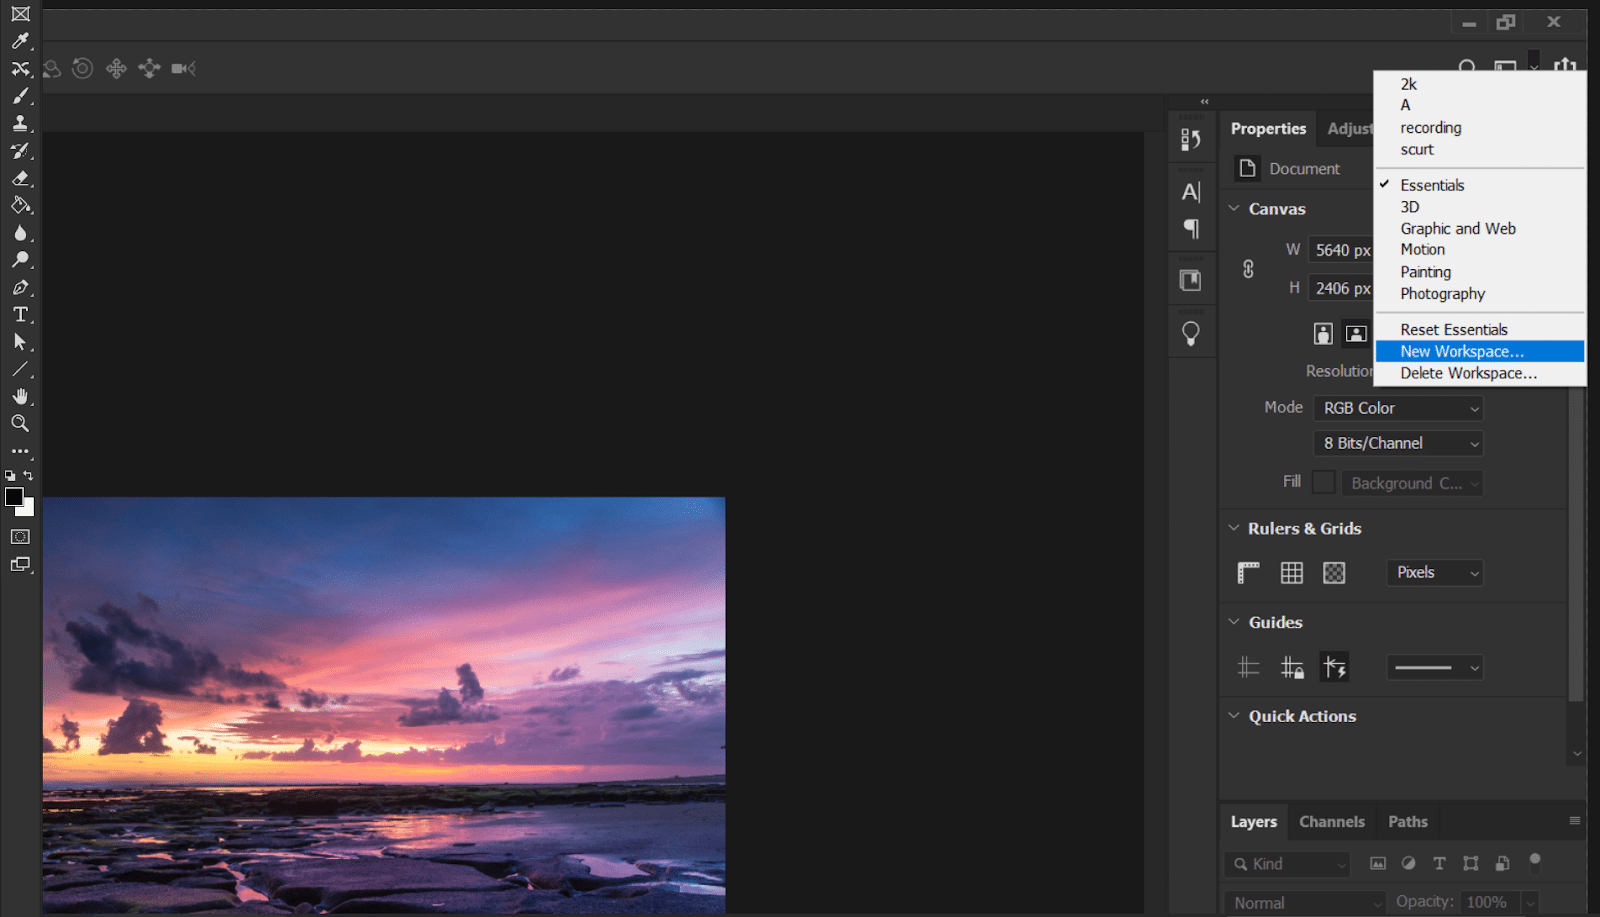
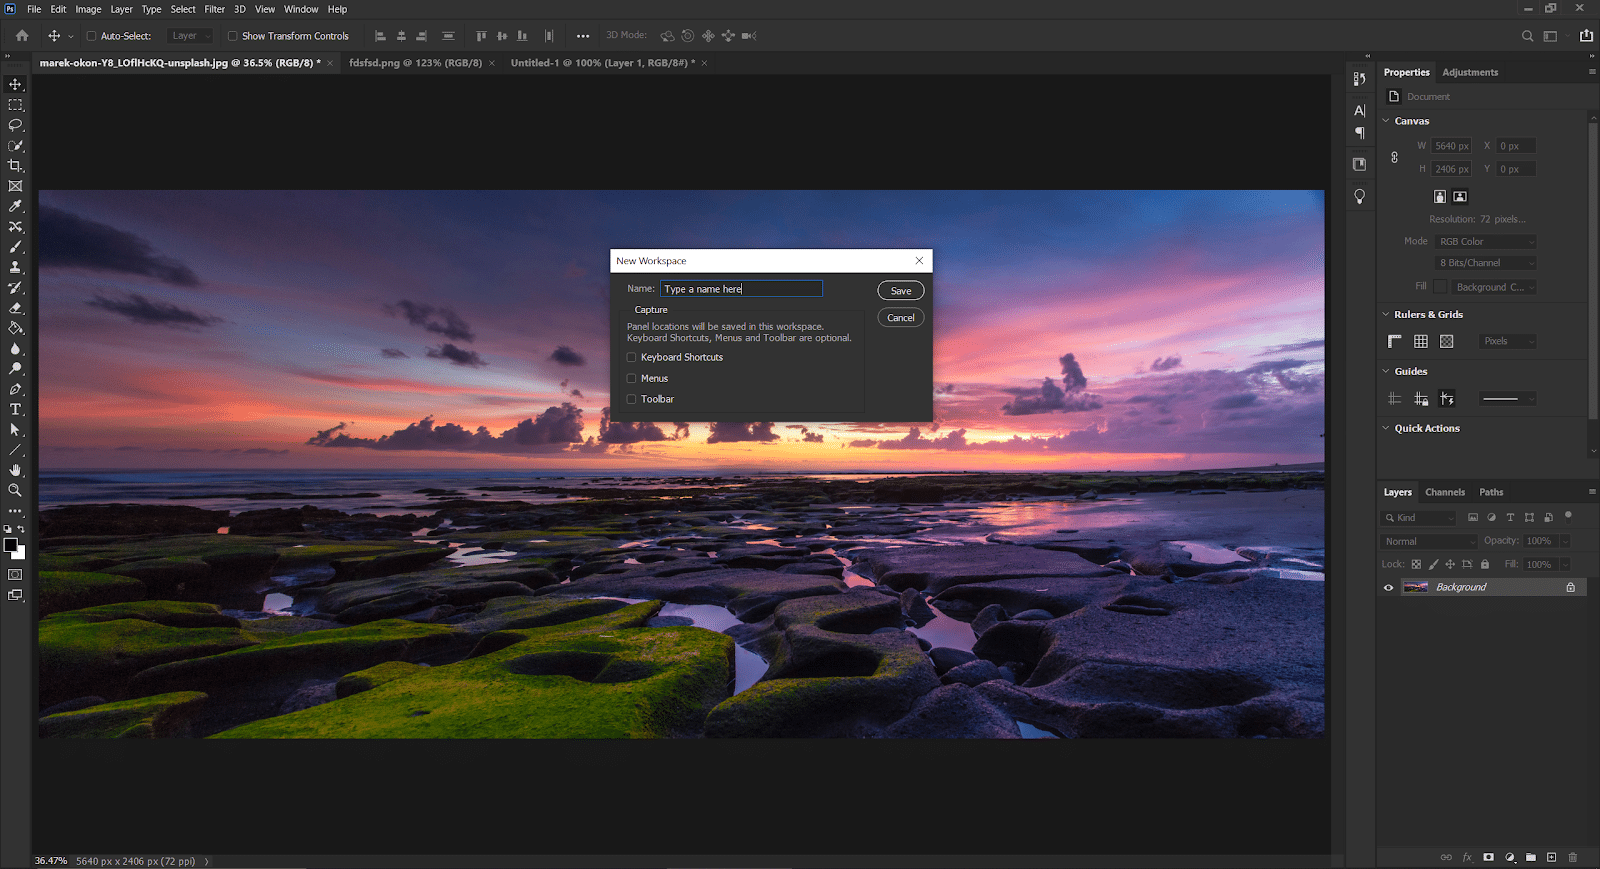
From this list choose New Workspace. In most cases, you don’t need to save your keyboard shortcuts, menus, and toolbar, but it’s up to you.
With your workspace saved you can let anyone else use your computer and move around your panels. When you want to revert to your layout, simply use the same menu and choose Reset [your name].
The Photoshop interface of a graphic designer
I know you may be curious about how a professional designer sets up their workspace so here’s mine.
There are no major surprises here. Because I specialize in web design, app design, and graphic design, I rely on the Properties, Layers, and Character panels. I also have the Libraries panel and brush settings collapsed.
Now, take the time to experiment with different panels and find what works for you. Just make sure you save your workspace so you can always come back to it.
